
Tracking Feature Flag Changes and Evaluation with Flagsmith and Sentry

Feature flags help teams control who sees a feature and when, reducing the impact of problematic code in production. Although beneficial, they introduce a high level of dynamism, making it difficult to track the impact of flag changes on end users.
This is where combining Sentry with Flagsmith becomes helpful. While Flagsmith provides feature flagging capabilities, Sentry captures flag changes and evaluates them with full context, giving clear insights into feature behaviour.
In this tutorial, you will learn how to integrate Flagsmith into a demo project for gating features. You will also integrate Sentry into your project, ensuring flag changes are tracked and evaluated.
Prerequisites
To follow through with this tutorial, you need:
- A Flagsmith account.
- A Sentry account.
- Node.js version 14 or above installed.
Understanding Sentry for application monitoring
Whether you are building a simple web app or a complex software architecture, encountering unexpected behaviour, especially during feature rollout, becomes inevitable. This is the solution Sentry provides, as it not only helps with error monitoring but also provides visibility into feature flag changes and their impact on end users.
Like Flagsmith, Sentry is an open-source platform. It provides services ranging from real-time tracking to error diagnosis. It enables developers to build higher-quality software by offering complete insight into application behaviour, including changes made to feature flags and their evaluations.
Sentry offers several key features that are relevant when monitoring feature flag changes. Some of them include:
- Breadcrumbs:
Imagine the browser history of an online shopper who visits an e-commerce homepage, browses products, adds a few items to the cart, and then encounters an error during checkout. That history would likely contain every step the shopper took before the error occurred. The Sentry Breadcrumbs feature works the same way.
Basically, breadcrumbs are trails of events that occurred prior to an error. When applied to feature flags, they offer useful insight into what flags were evaluated, toggled or changed before an issue occurred, making debugging easier.
- Context & tags:
Sentry allows developers to attach extra information to events using two key features: Context & Tags.
Context allows the addition of arbitrary data, such as strings, objects, or lists, to an event. This provides extra information about what was happening in the application at the time the event was captured or what flags were active at the time of an event, helping developers understand and debug issues more effectively.
Tags, on the other hand, are searchable key/value string pairs indexed by Sentry and used to filter, search, and analyse related events across the system.
- Audit & release data:
Sentry offers two unique features that provide insight into project activity and deployments, allowing developers to see who made changes to project settings and when a new version of an application was released. These features are Release data and Audit logs.
Release data offers insight into what code was deployed, allowing developers to identify issues or regressions introduced alongside new flags. Audit logs, on the other hand, provide a record of every configuration change, including flag updates, made within a Sentry project, giving visibility into who modified flags, when, and under which environment.
Setting up a demo project
To fully understand how to track and evaluate flag changes, you will clone a sample project and set up Flagsmith and Sentry.
To get started, open your terminal and run:
git clone https://github.com/Slimdan20/Rapxtar
cd Rapxtar
npm installNote: The project used in this tutorial is a music landing page built with Next.js. It contains a “trending playlist” section, currently commented out and will serve as the test feature for implementing Flagsmith and Sentry.
Integrating Flagsmith for gating features
To begin integrating Flagsmith into your demo project, log in to your Flagsmith account.
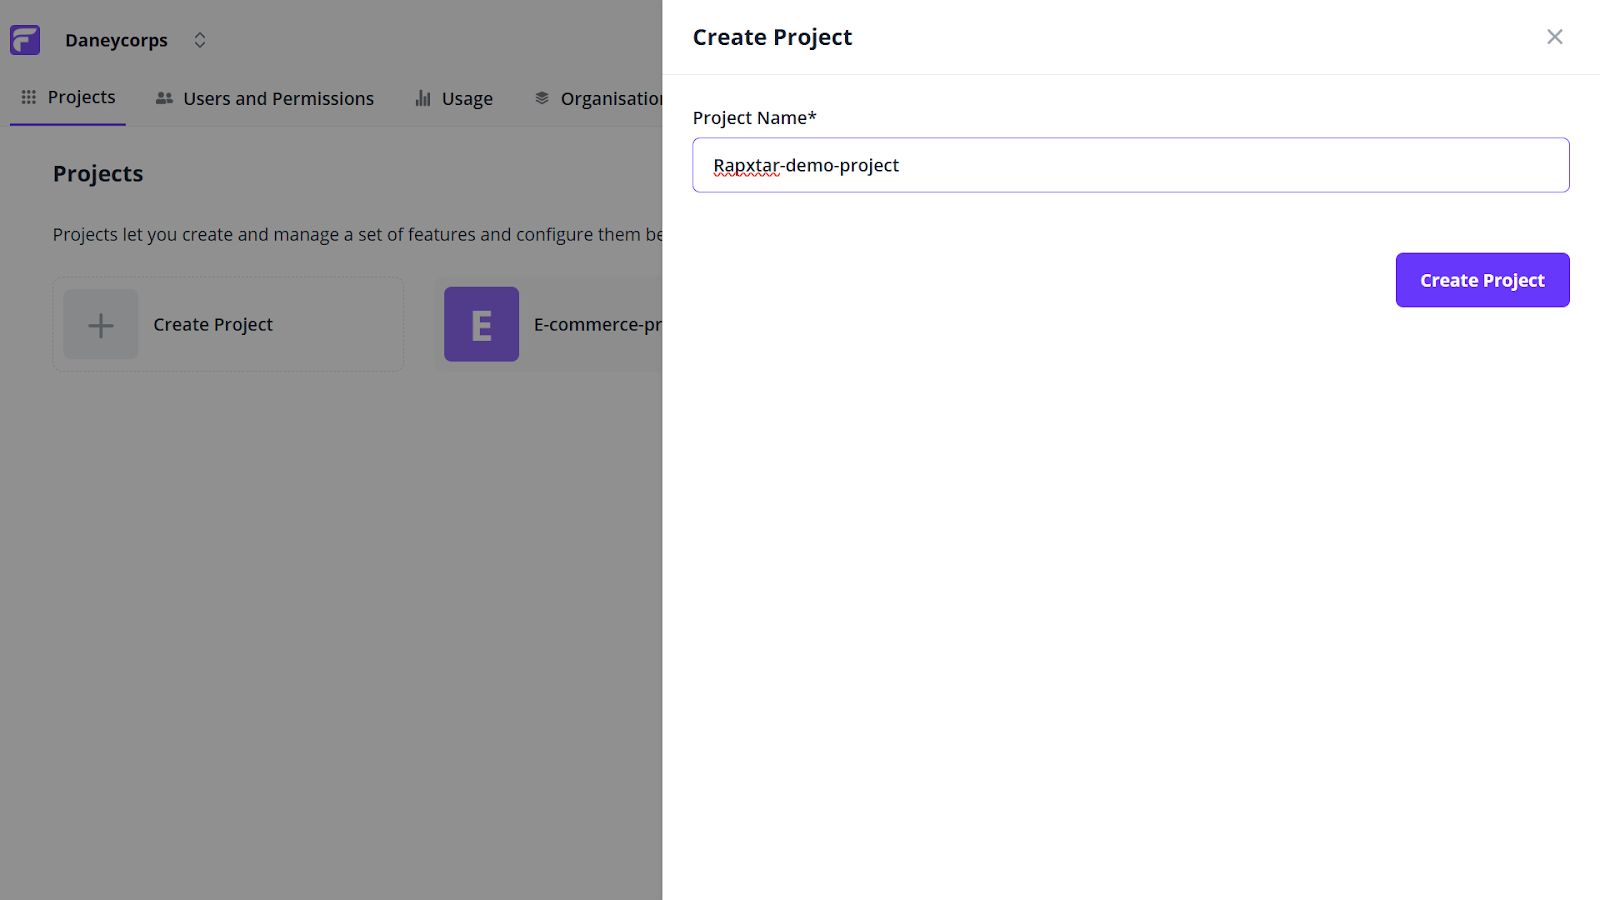
In your flagsmith dashboard, navigate to Projects → Create Project, enter a valid project name (this tutorial uses Rapxtar-demo-project as its project name) and click the Create Project button to continue.
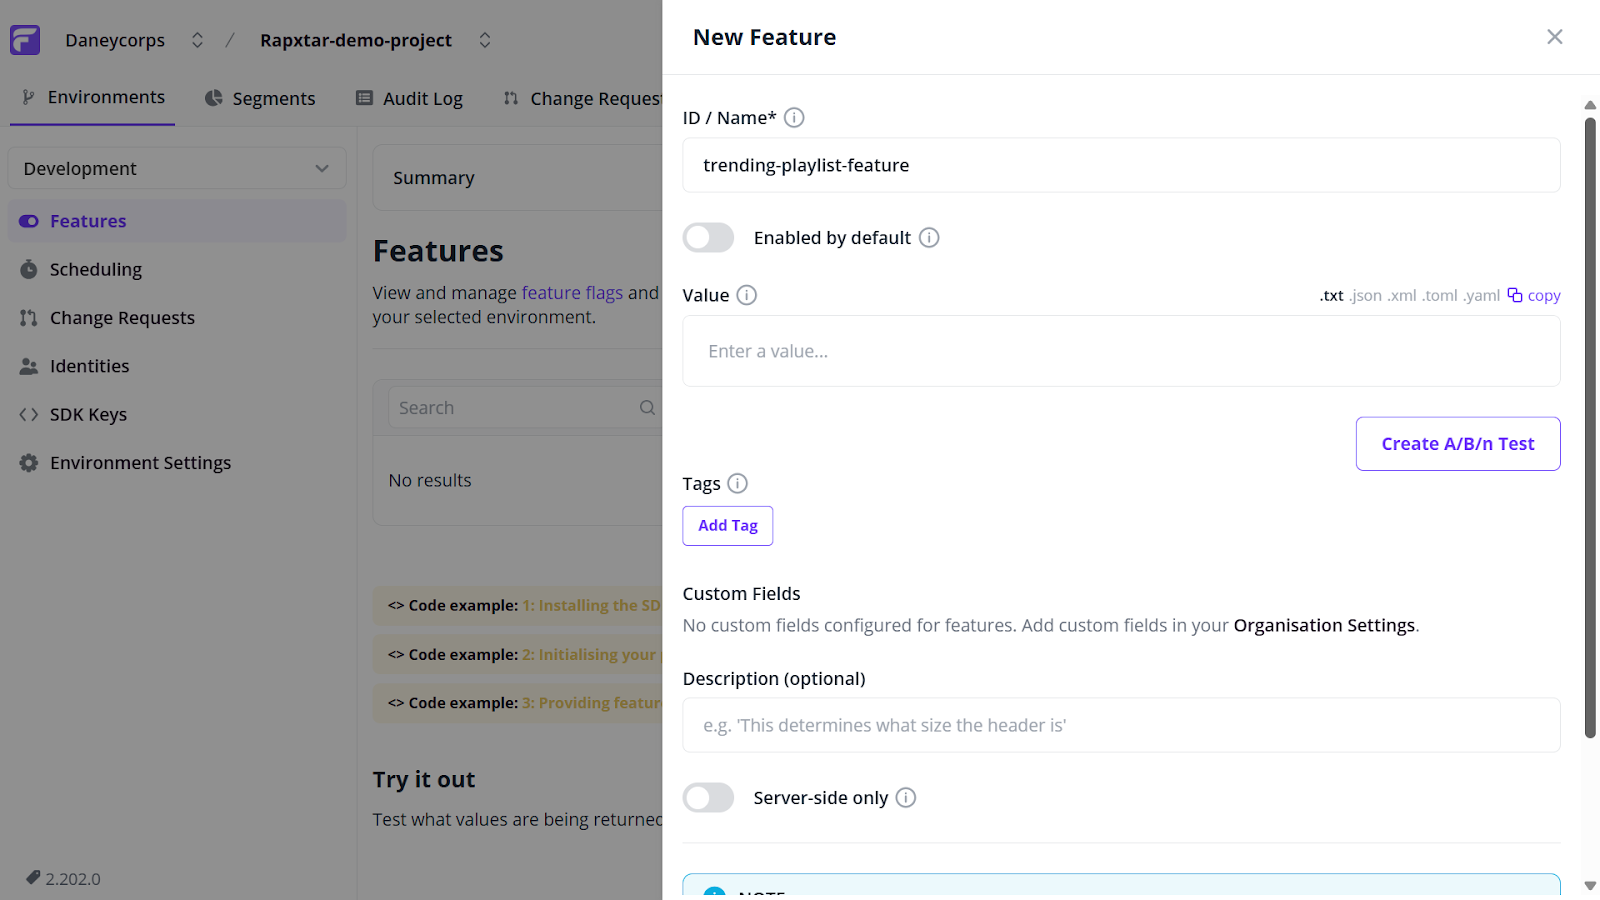
Within your created project, head to the Features tab → Create Feature. Enter a valid feature name (this tutorial uses trending-playlist-feature as its feature name) and click the Create Feature button.
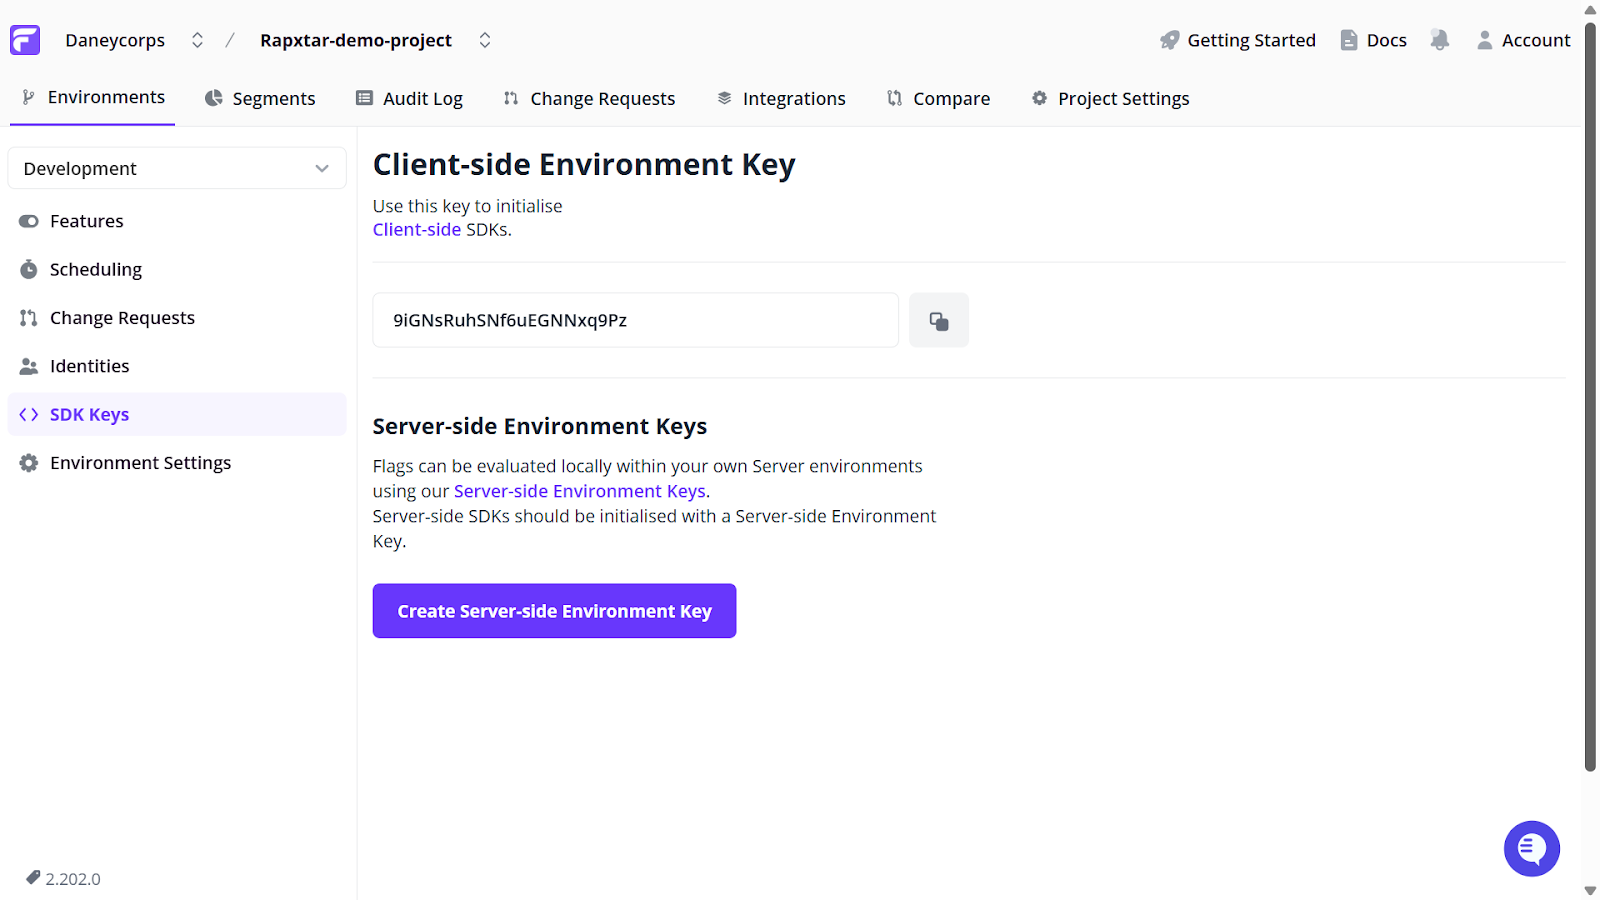
Navigate to the SDK Keys tab and copy the Client-side Environment Key, as you will require it in the later steps of this tutorial.
Go to your project terminal and install the JavaScript client for flagsmith by running:
npm i flagsmith --saveNext, navigate to src/app and create a Providers folder. Within this folder, create a FlagsmithWrapper.jsx file and update its content as follows:
"use client";
import { useEffect, useState } from "react";
import { FlagsmithProvider } from "flagsmith/react"; //Imports the FlagsmithProvider component from the Flagsmith React SDK
import flagsmith from "flagsmith"; //Imports the Flagsmith client SDK instance


export default function FlagsmithWrapper({ children }) {
  const [ready, setReady] = useState(false);


  useEffect(() => {
    flagsmith
      .init({
        environmentID: "YOUR_ENVIRONMENT_ID", //connects your app to the correct Flagsmith project and environment
      })
      .then(() => setReady(true))
      .catch((err) => {
        console.error("Flagsmith initialization failed:", err);
        setReady(true);
      });
  }, []);


  if (!ready) return null;


  return (
    <FlagsmithProvider flagsmith={flagsmith}>
      {children}
    </FlagsmithProvider>
  );
}Note: Replace YOUR_ENVIRONMENT_ID with your client-side Environment Key copied earlier.
Now, import and wrap your project with Flagsmith. To do this, navigate to src/app/layout.js and add the FlagsmithWrapper import at the top of the file.
Then wrap your existing {children} with the <FlagsmithWrapper> component as shown below:
import FlagsmithWrapper from "./Providers/FlagsmithWrapper"; // import the FlagsmithWrapper component created earlier


export default function RootLayout({ children }) {
  return (
    <html lang="en">
      <body>
        <FlagsmithWrapper>
          {children}
        </FlagsmithWrapper>
      </body>
    </html>
  );
}
Finally, update your commented “trending playlist” section to utilise Flagsmith. To do this, go to your src/app/page.js file and update its content as follows:
"use client"
import {useFlagsmith} from "flagsmith/react";


export default function Home() {
  const flagsmith = useFlagsmith();
  const discoverEnabled = flagsmith.hasFeature("trending-playlist-feature");
  return (
    <main>
      <div className=' bg-[url("/images/header.png")] h-screen w-full bg-no-repeat bg-center bg-cover'>
      <Navbar/>
      <Homepage/>
      </div>
      <Interact />
      {discoverEnabled && <Discover />}
      <Download />
      <Contact/>
      <Footer/>


    </main>
  );
}Note: The code snippet above only shows the parts of page.js related to Flagsmith. Do not replace your entire file with the code snippet. You can find the complete code on GitHub.
In the code above:
- const flagsmith = useFlagsmith(); allows your component to access the necessary feature flag data from Flagsmith.
- const discoverEnabled = flagsmith.hasFeature("trending-playlist-feature"); checks if the trending-playlist-feature flag is enabled. It returns true if the flag is active, and false otherwise.
- {discoverEnabled && <Discover />} renders the Discover component when the flag is enabled, and removes it from the UI when disabled.
To activate your feature flag, head to your Flagsmith dashboard → Features tab and toggle your feature on (this tutorial uses trending-playlist-feature).
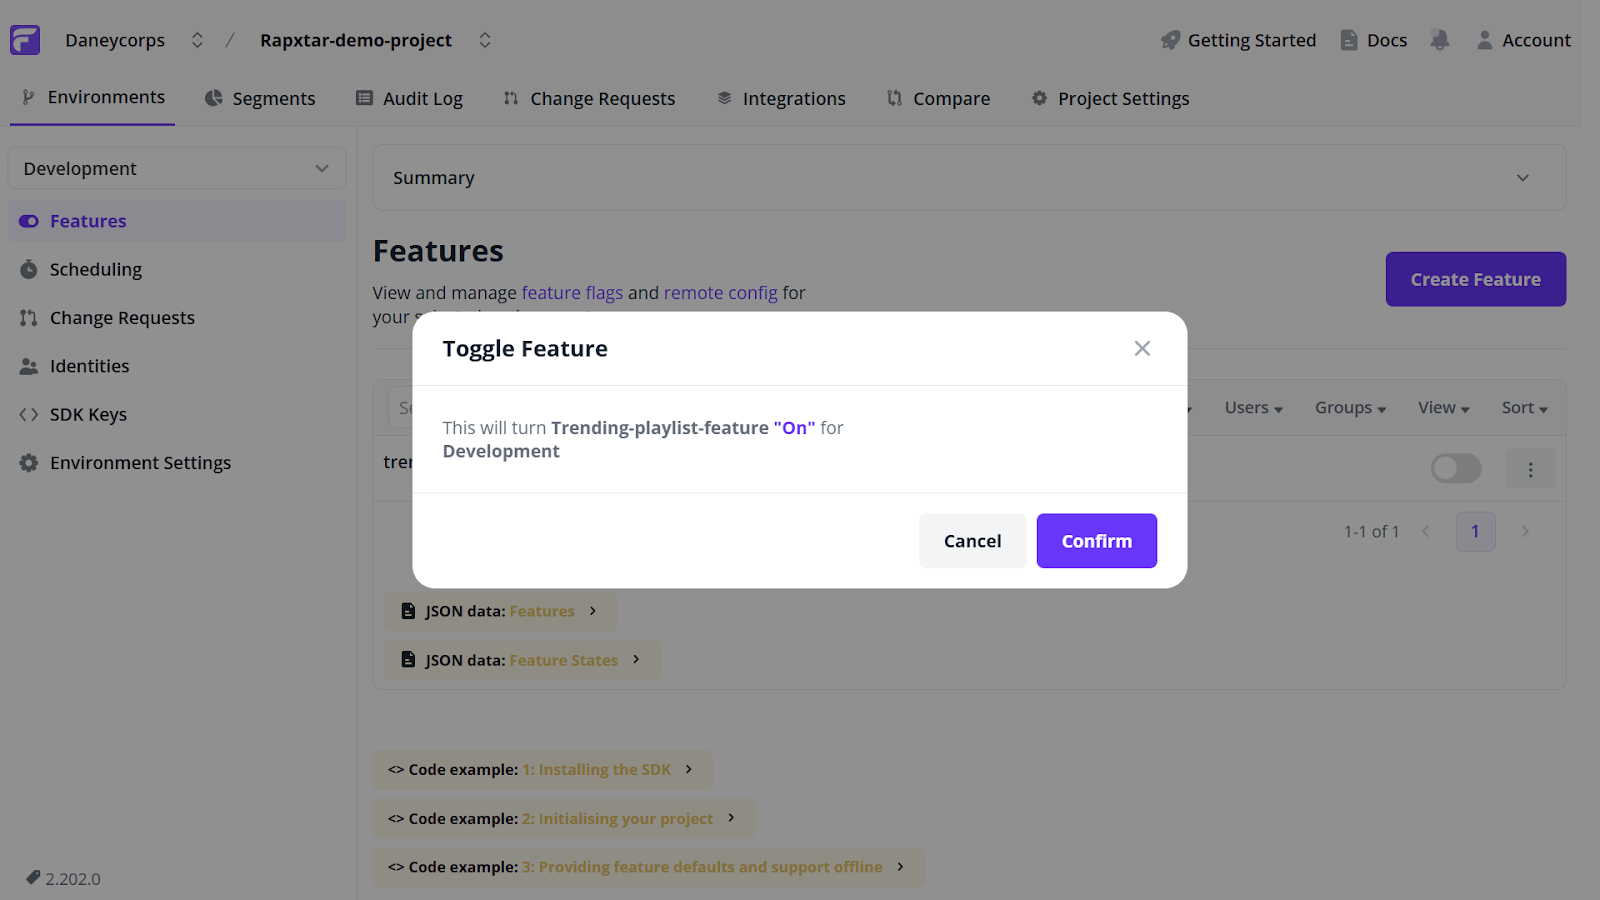
Finally, open your project in a browser by entering the following command in your terminal:
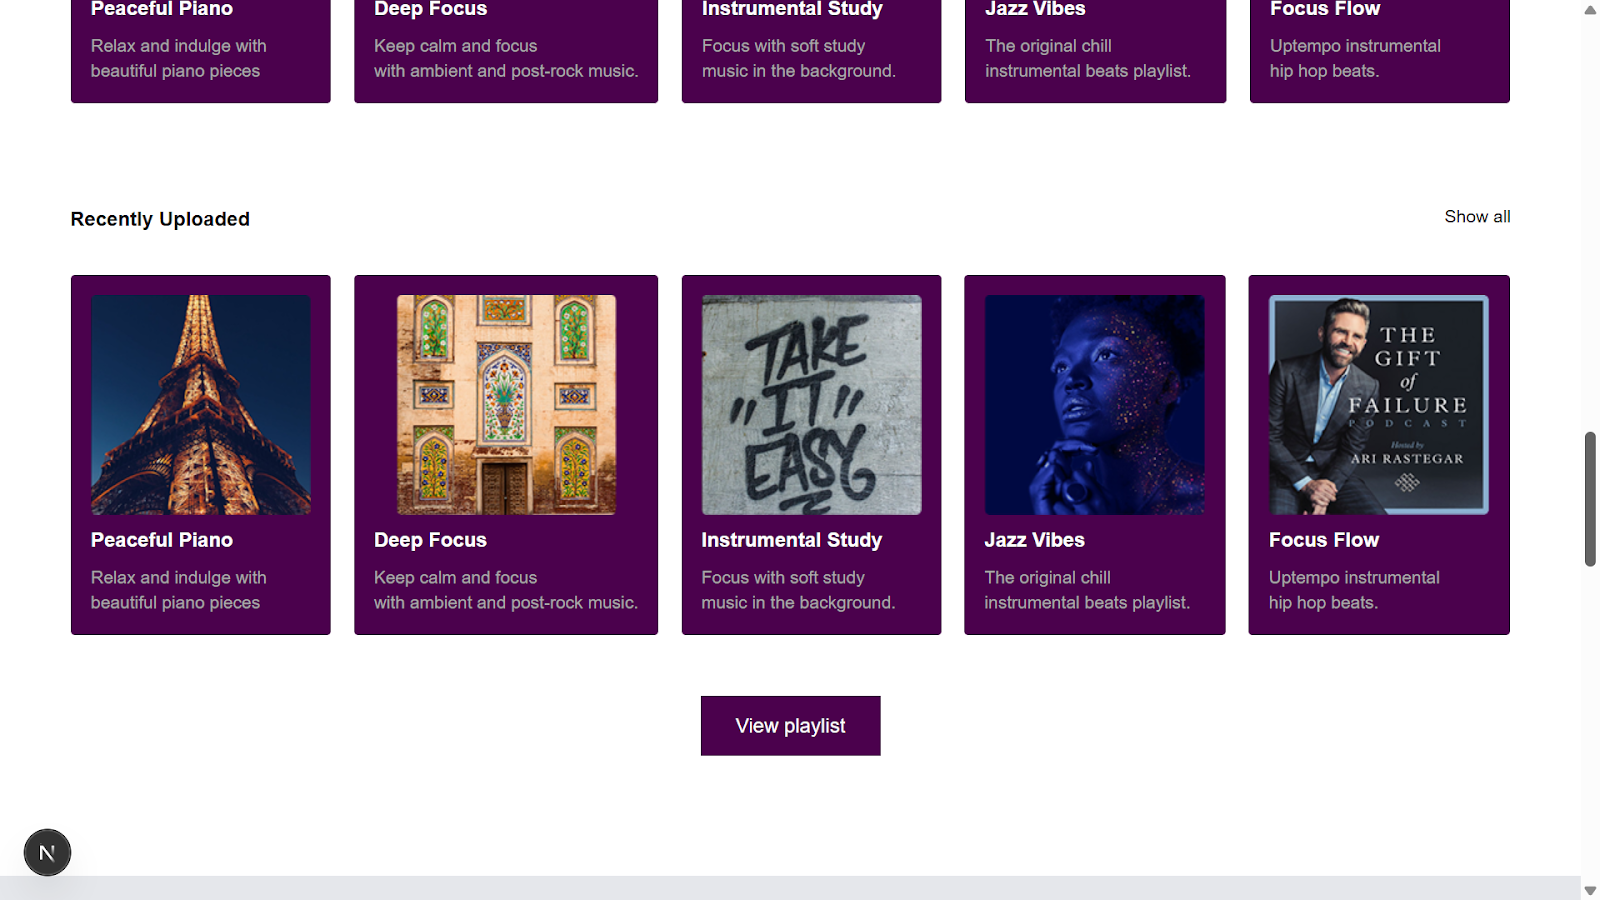
npm run devWith everything properly configured, you should find your trending playlist section visible.

There you go! You can now control who sees your feature by toggling it on or off.
Setting up Sentry for feature flag monitoring and evaluation
With Flagsmith now gating your feature and controlling who sees the “trending playlist” section and when, it is time to integrate Sentry. This will allow you to track feature flag changes and capture flag evaluations at runtime, offering insight into flags’ impact on users.
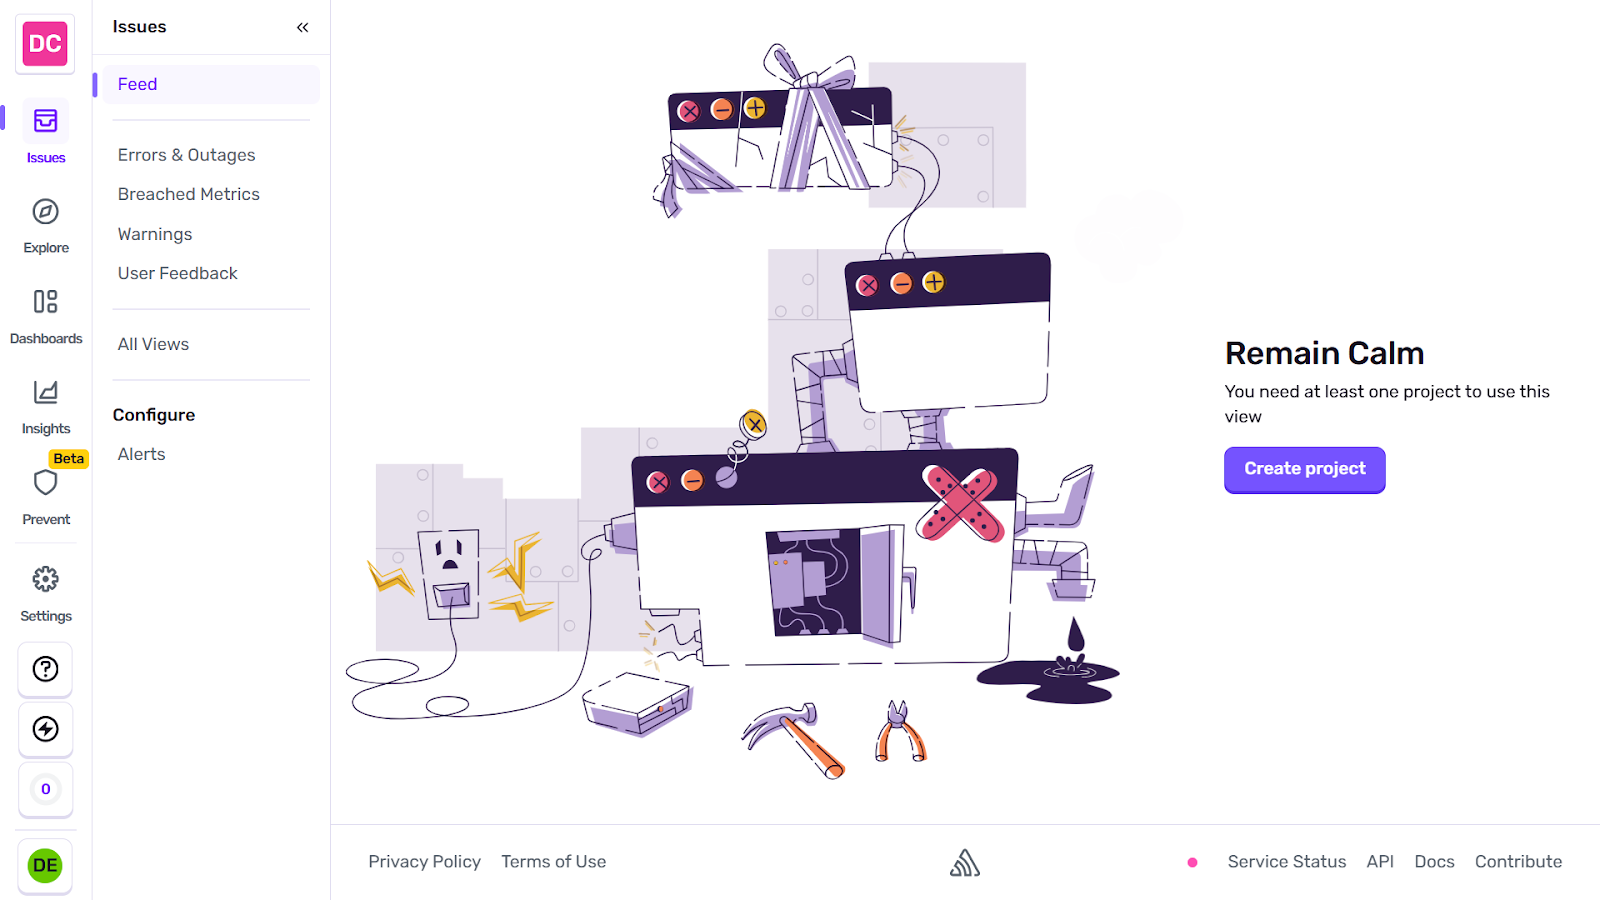
To get started, sign in to your Sentry account.
Within your Sentry dashboard, click on the Create project button to continue.
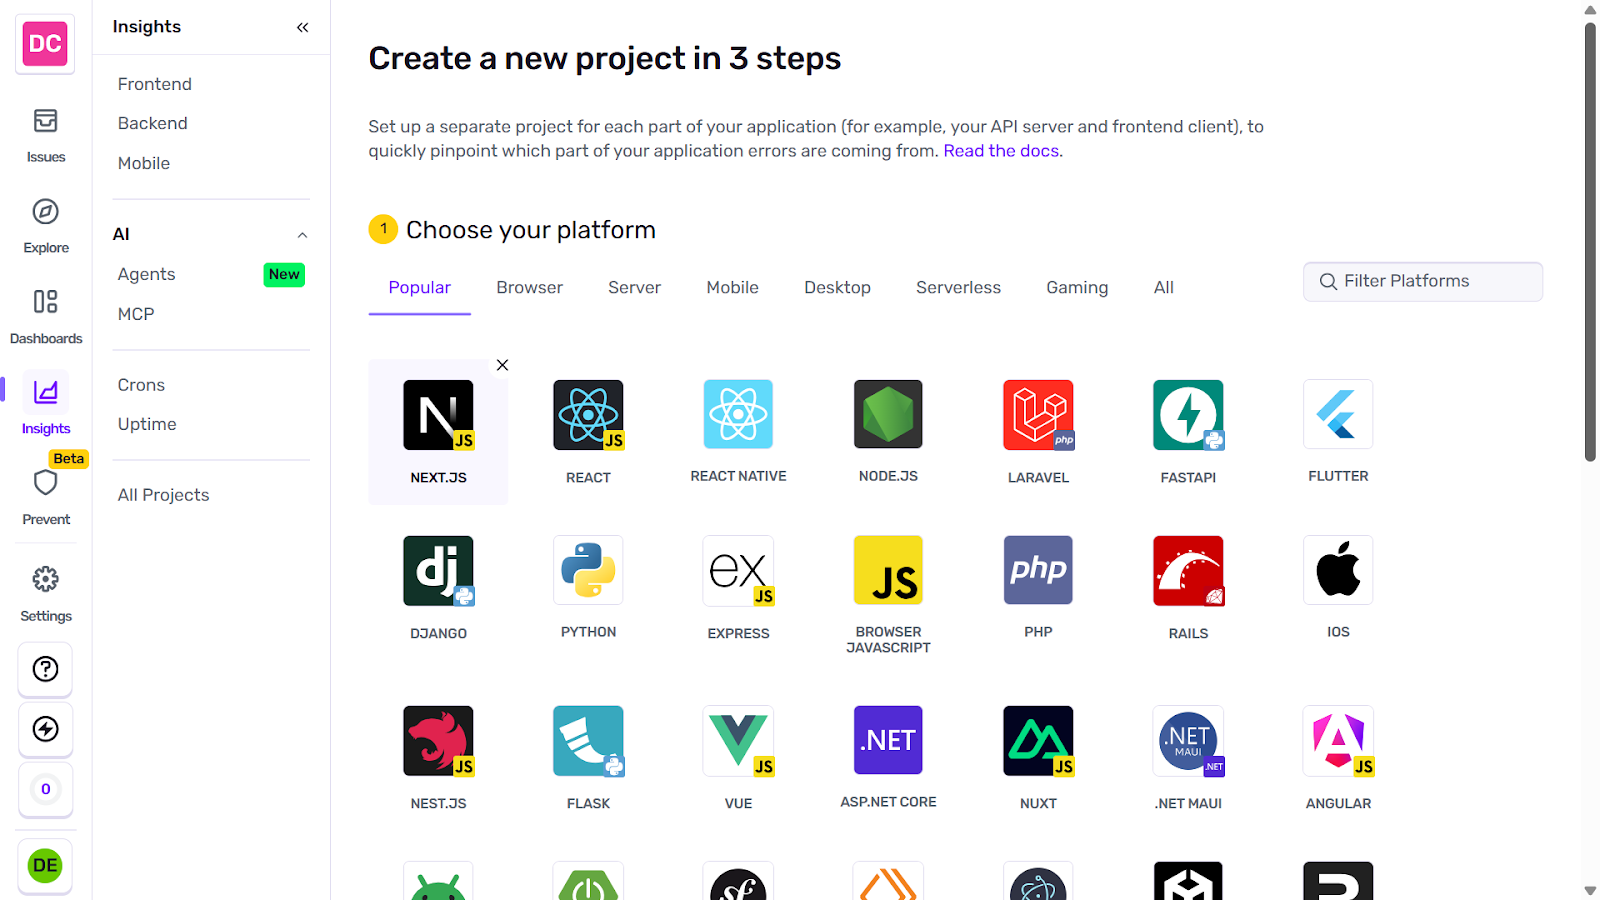
A project setup page will open, showing three steps to complete your Sentry project creation. To continue, scroll to the Choose your platform section and select Next.js from the list of options (the demo project used in this tutorial was built with Next.js)
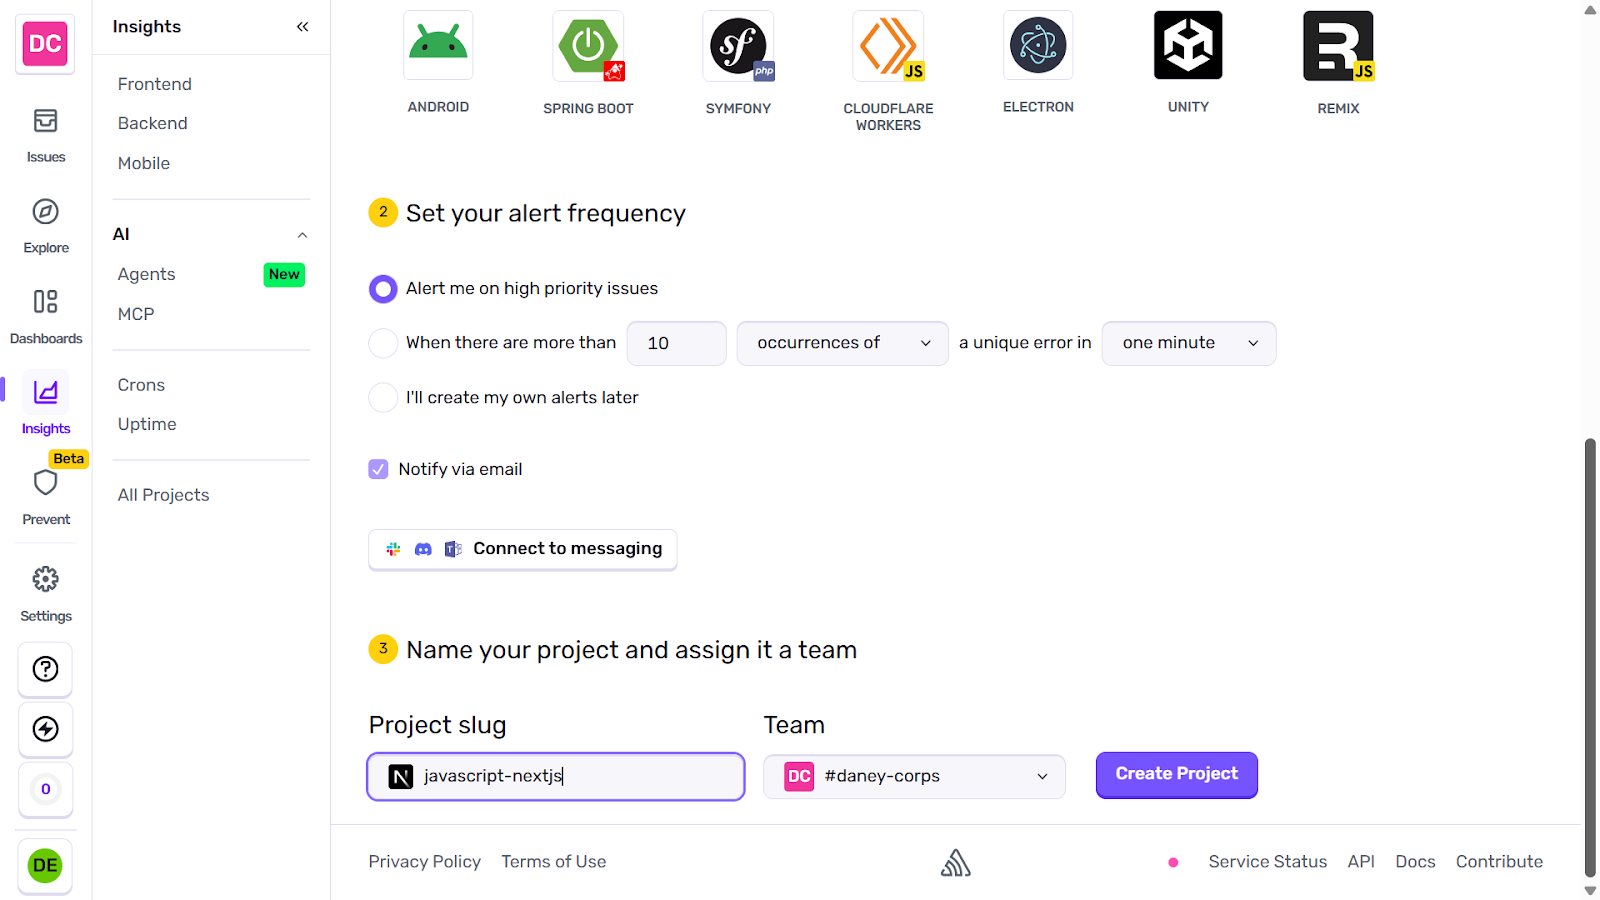
Next, move to the Set your alert frequency section. This step is optional, so you can leave it as is.
Finally, name your Sentry project, assign it to a team, and complete the setup by clicking the Create project button.
You will be directed to the Sentry configuration page for Next.js. Copy the command to run the Sentry wizard for automatic setup, then open your project terminal to continue.
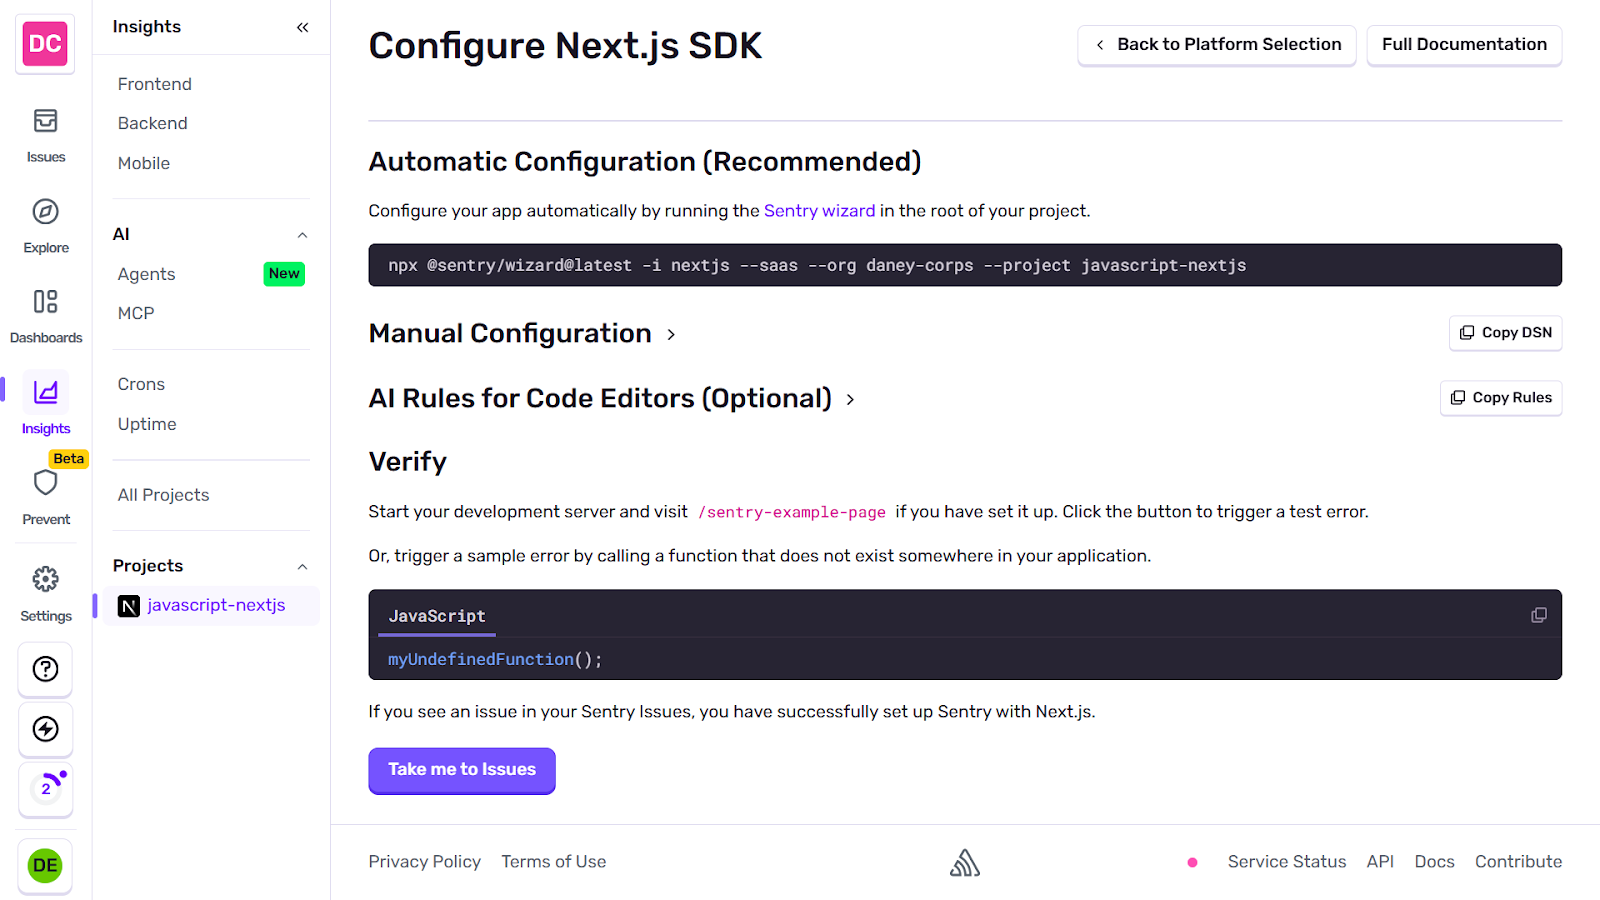
Enter the copied command in your project terminal. You will be prompted to answer a few questions during the installation process:
- Do you want to route Sentry requests in the browser through your Next.js server
to avoid ad blockers? Choose No.
- Do you want to enable Tracing to track the performance of your application? Select No.
- Do you want to enable Session Replay to get a video-like reproduction of errors
during a user session? Choose No.
- Do you want to enable Logs to send your application logs to Sentry? Select No
- Do you want to create an example page (“/sentry-example-page”) to test your
Sentry setup? Choose Yes.
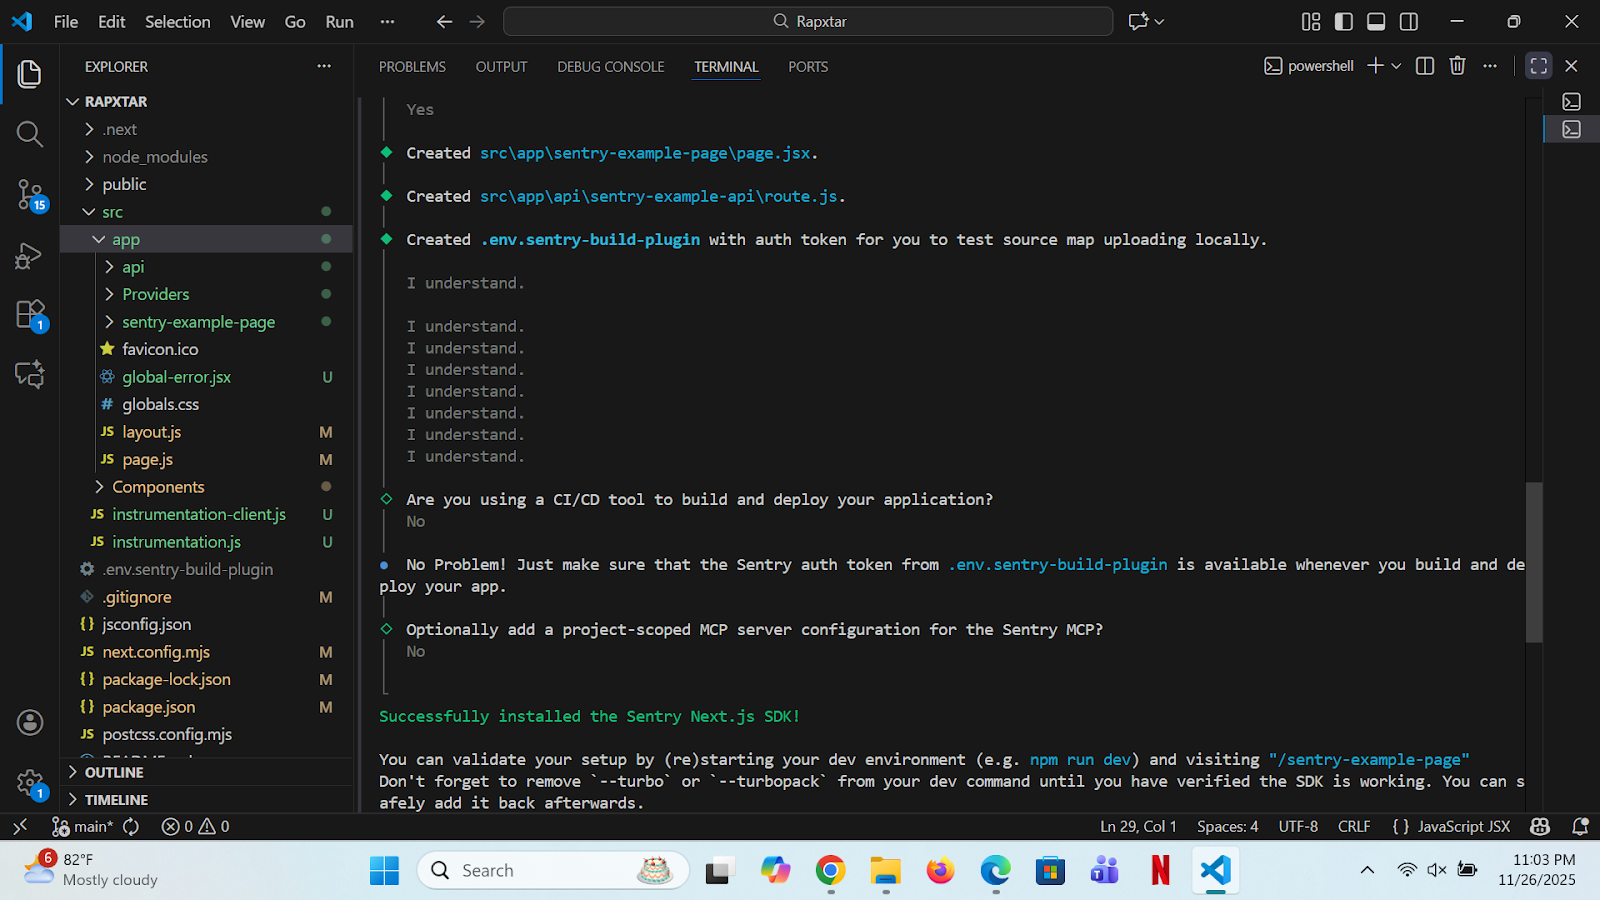
- Are you using a CI/CD tool to build and deploy your application? Select No.
- Optionally add a project-scoped MCP server configuration for the Sentry MCP? Select No.
You should see a success message stating Sentry was successfully installed. Additionally, the necessary Sentry files will be added to your project.
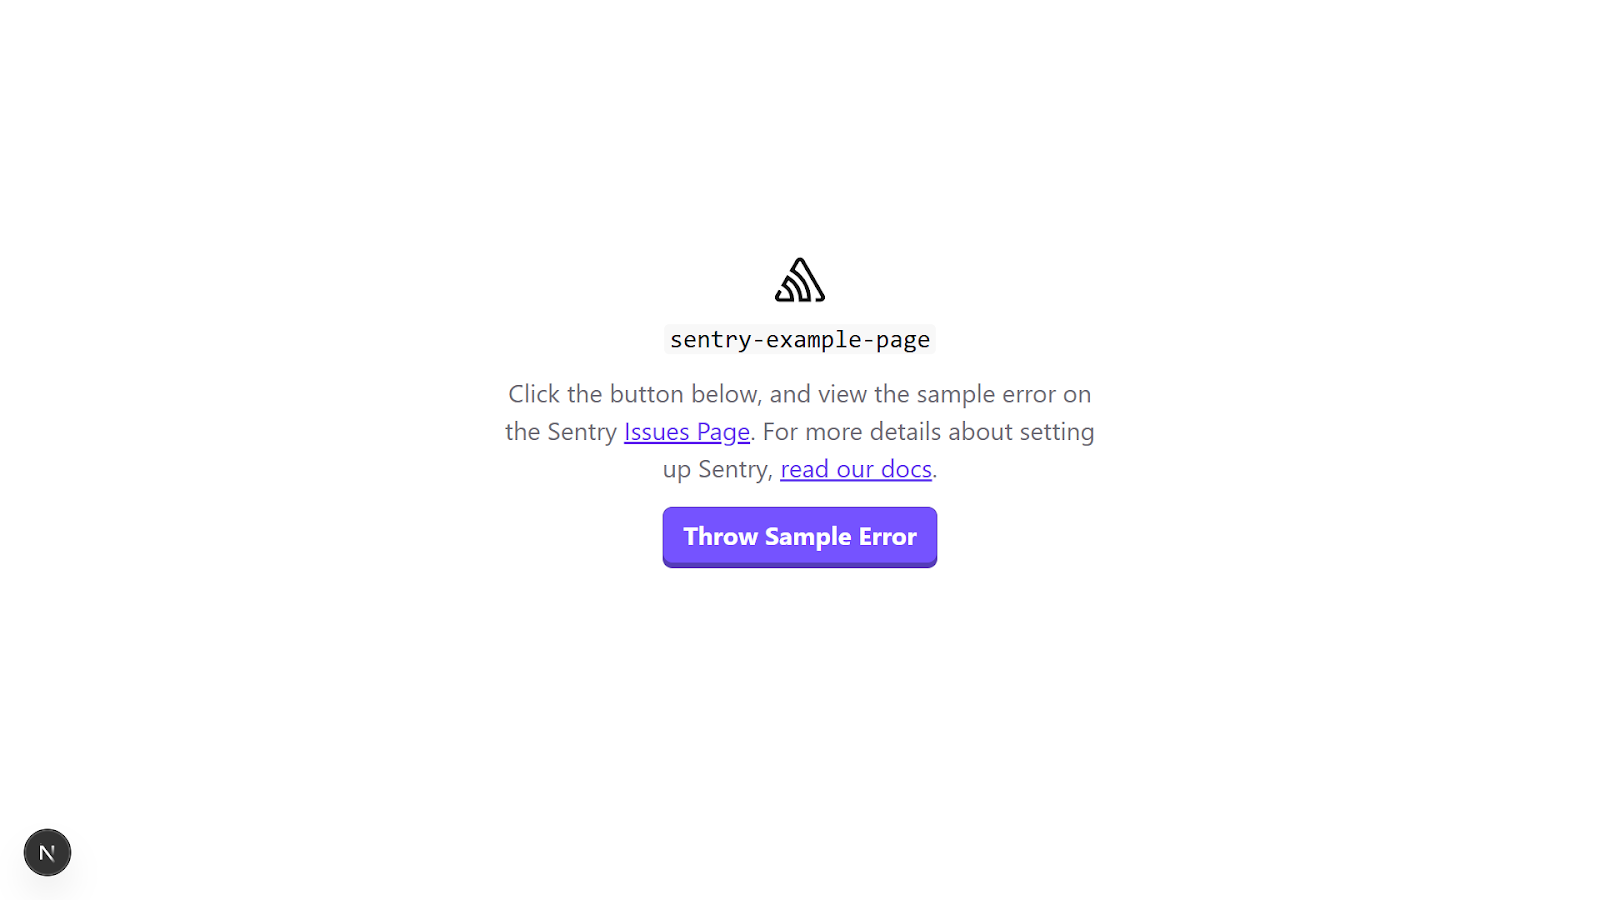
To confirm that Sentry was properly configured in your project, open your browser and navigate to the example page created by the Sentry wizard by entering the URL: “http://localhost:3000/sentry-example-page.” Then, click the Throw Sample Error button to continue.
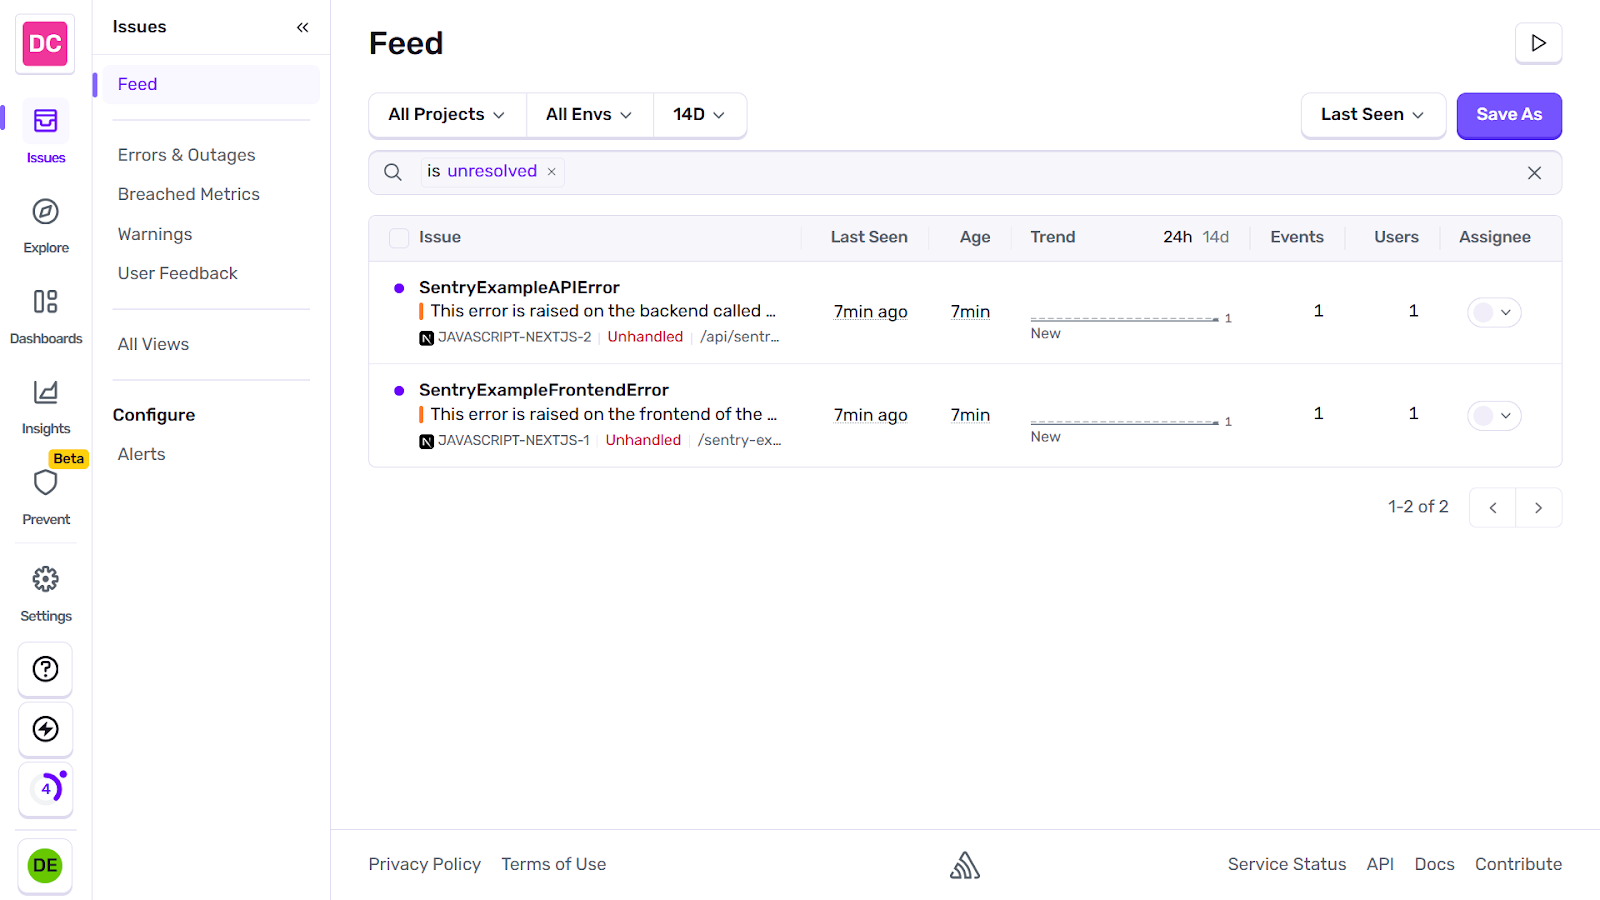
You should see an “Error sent to Sentry” message. To fully confirm, click the Take me to Issues button on your Sentry configuration page for Next.js or go to your Sentry dashboard → Issues → Feed, where you will find your logged test errors.
Tracking feature flag changes with Flagsmith - Sentry integration
Now that you have Sentry properly configured in your project, you can extend your workflow by integrating it with Flagsmith. This integration will help track feature flag changes, giving visibility into when feature flag definitions are modified and which actions were taken, such as what flags were toggled on/off, changed rules, or renamed flags.
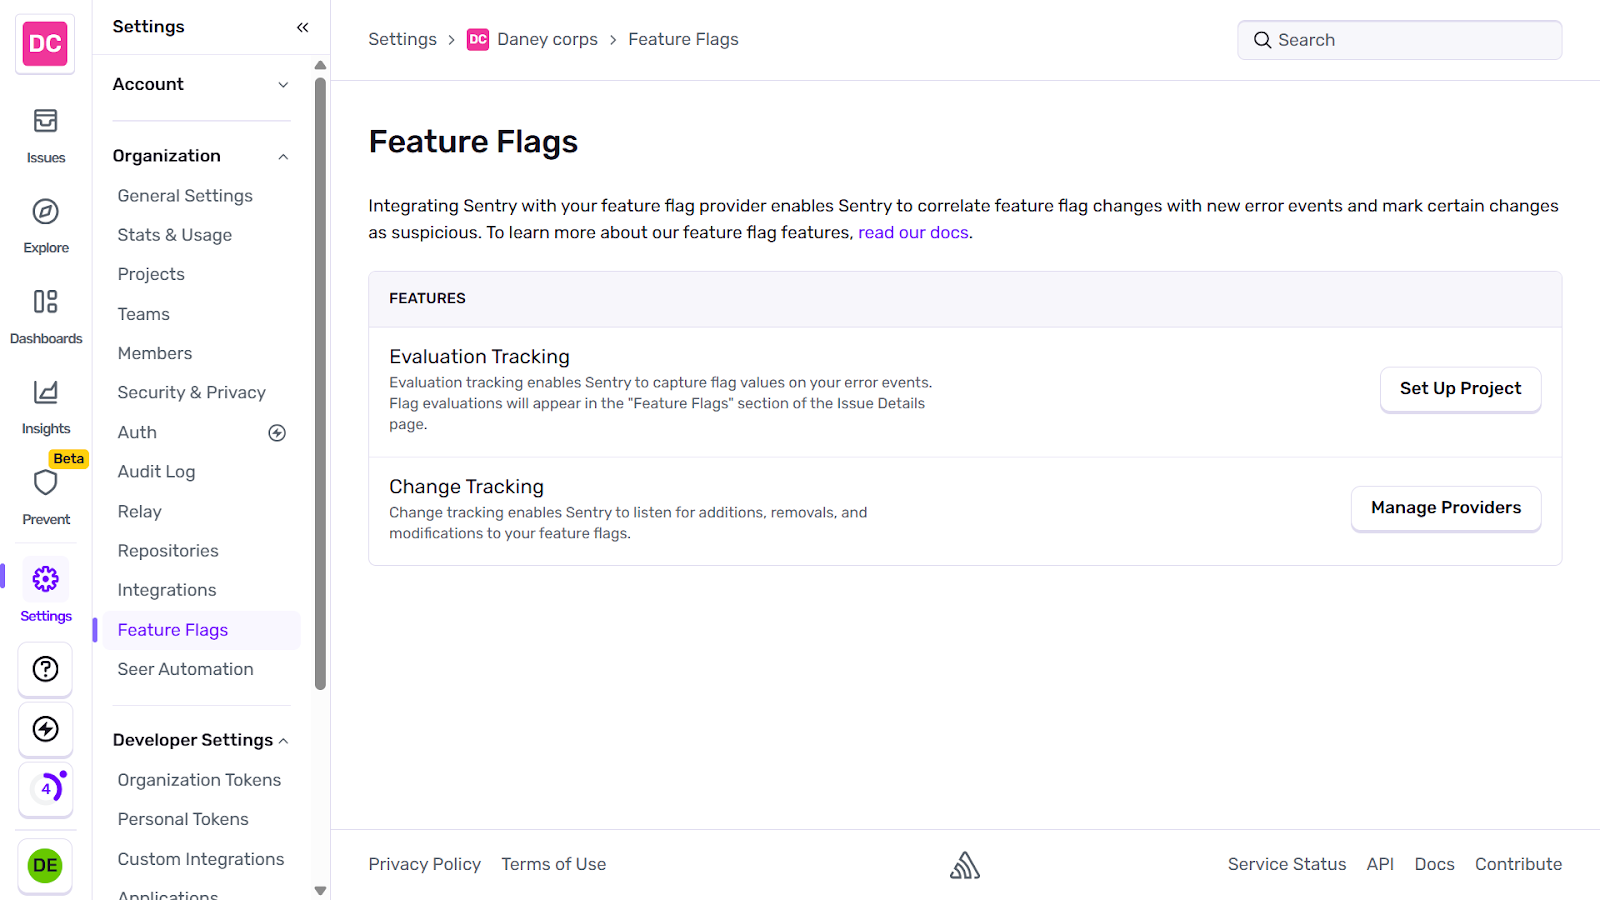
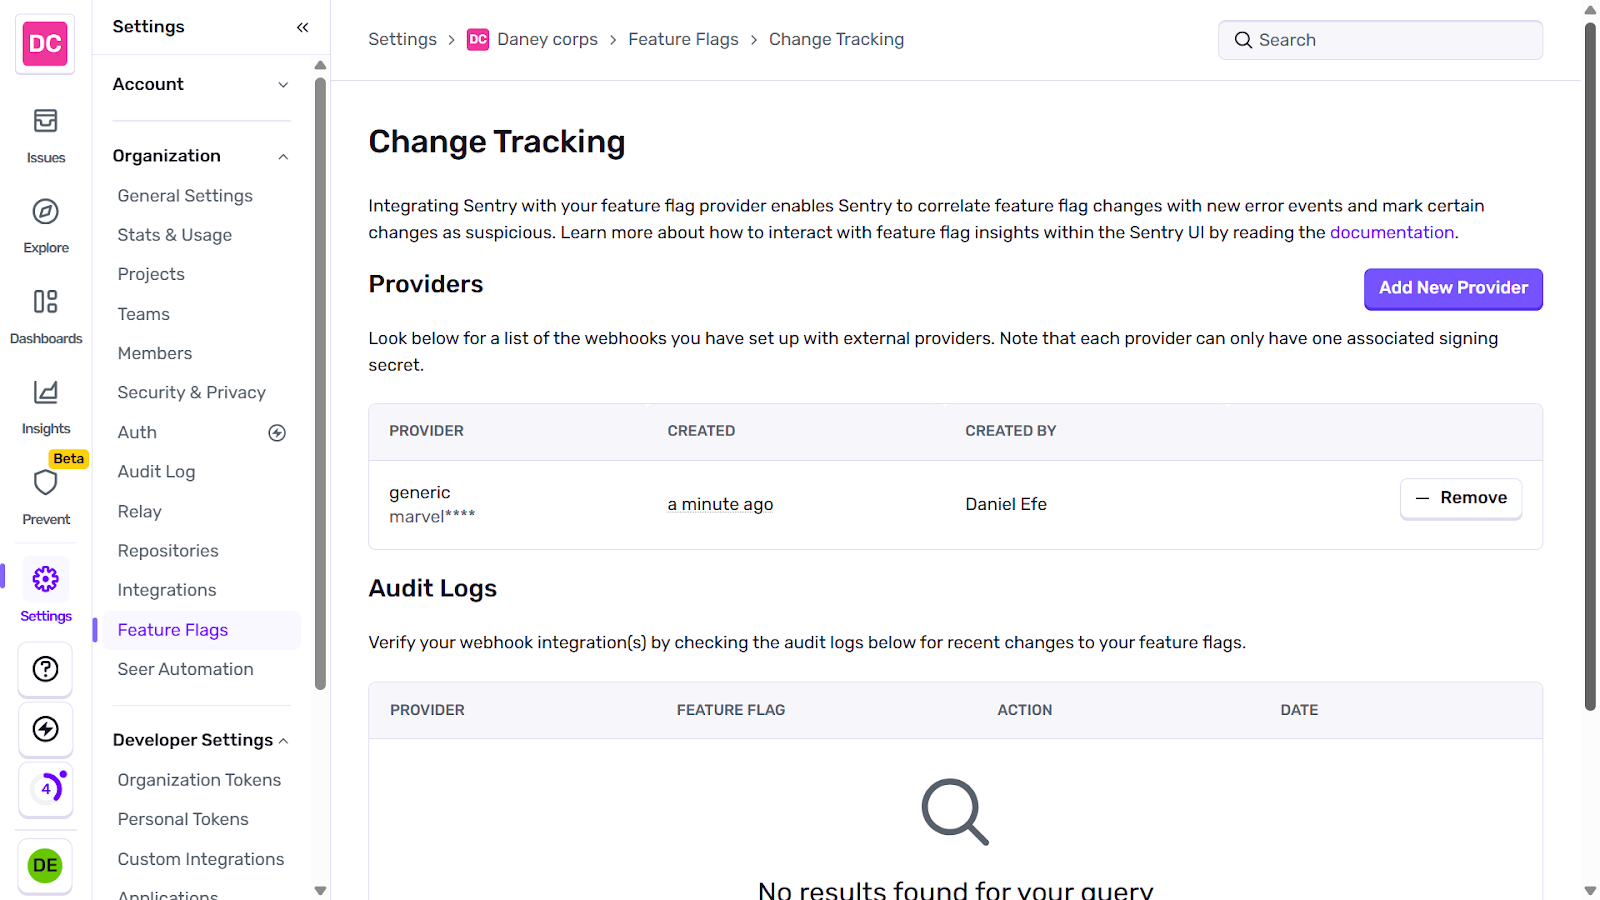
To get started with tracking flag changes, go to your Sentry dashboard → Settings → Feature Flags. In the Change Tracking section, click the Manage Providers button to continue.
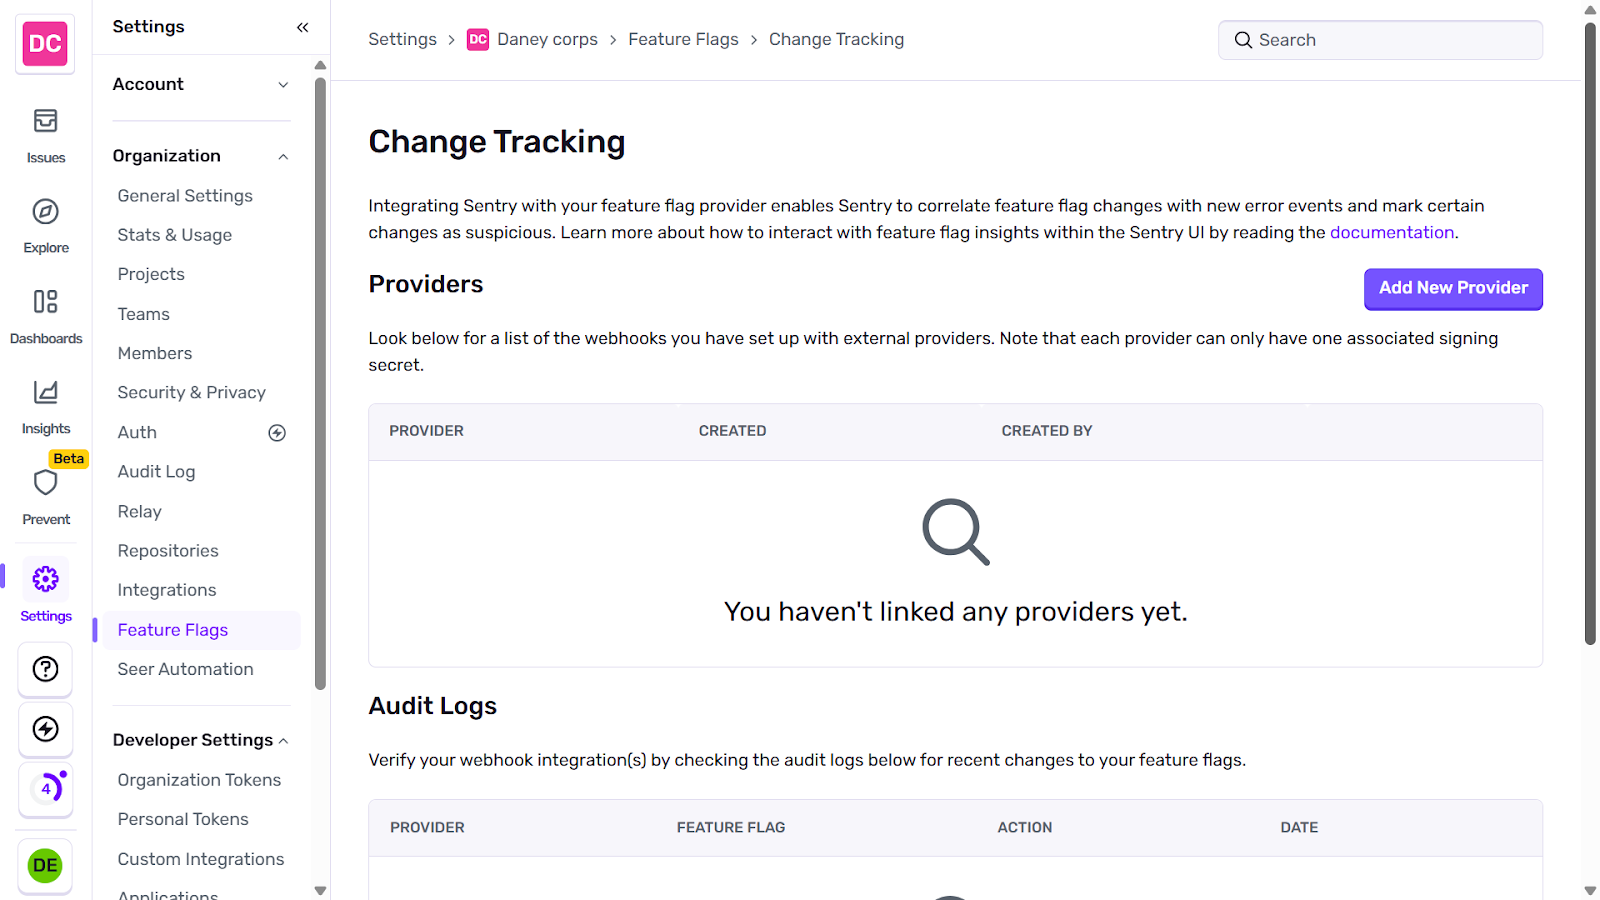
Now in the Change Tracking page, click on the Add New Provider button.
You will find a drop-down menu labelled “Select a provider”. Choose Generic from the list of options. This will generate a Webhook URL for further integration.
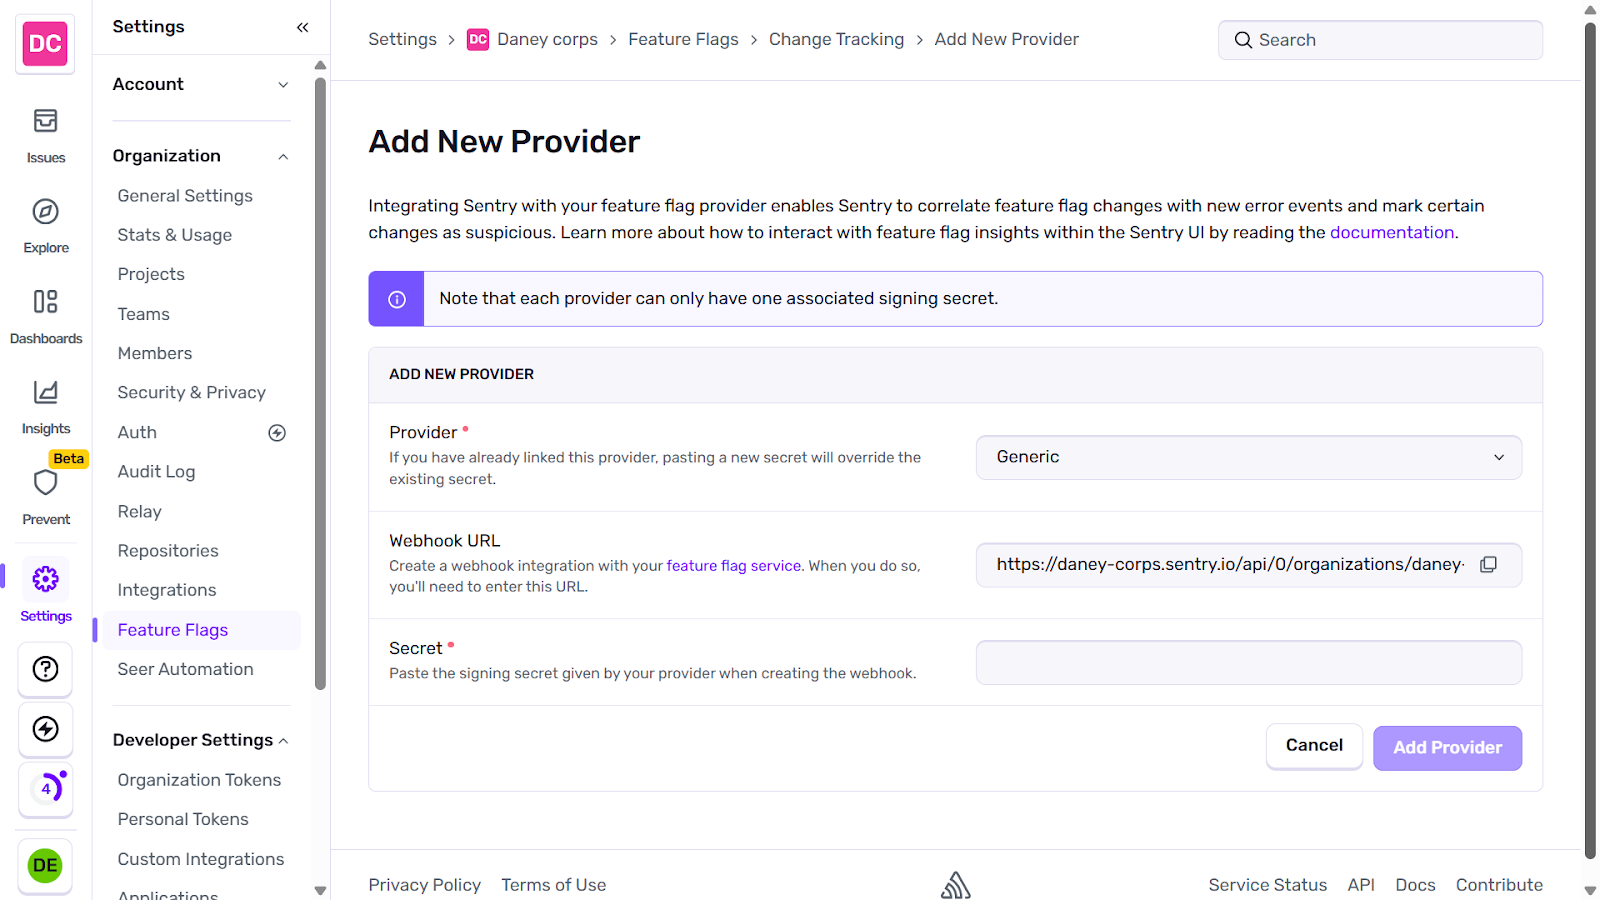
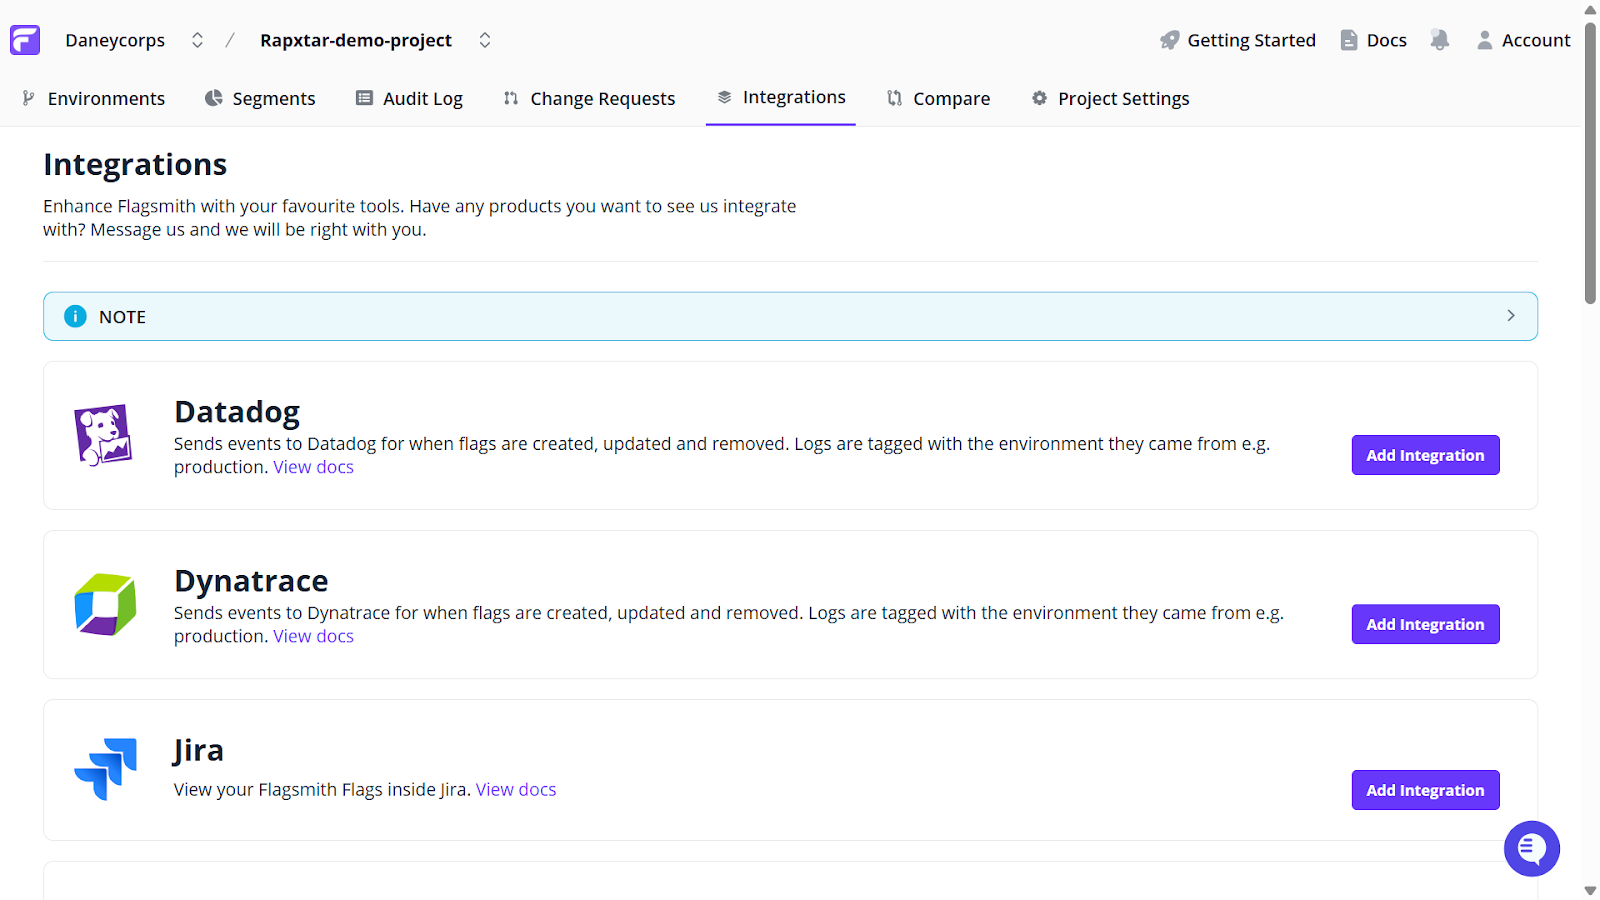
Copy the URL and navigate to your Flagsmith dashboard → Projects → Integrations. Select Sentry from the list of integration tools provided, and click the Add Integration button to continue.
Next, fill in the following:
- Flagsmith Environment: Production (the feature flag used in this tutorial was created in the production environment).
- Webhook URL: Input your copied Webhook URL from Sentry.
- Secret: Input a secret key of your choice, between 10 and 60 characters long.
Copy your entered signing secret and finish by clicking the Save button.

SHead back to your Add New Provider page on sentry and input your copied signing secret into the Secret field. Finish your integration by clicking the Add Provider button, then click Done on the subsequent page.
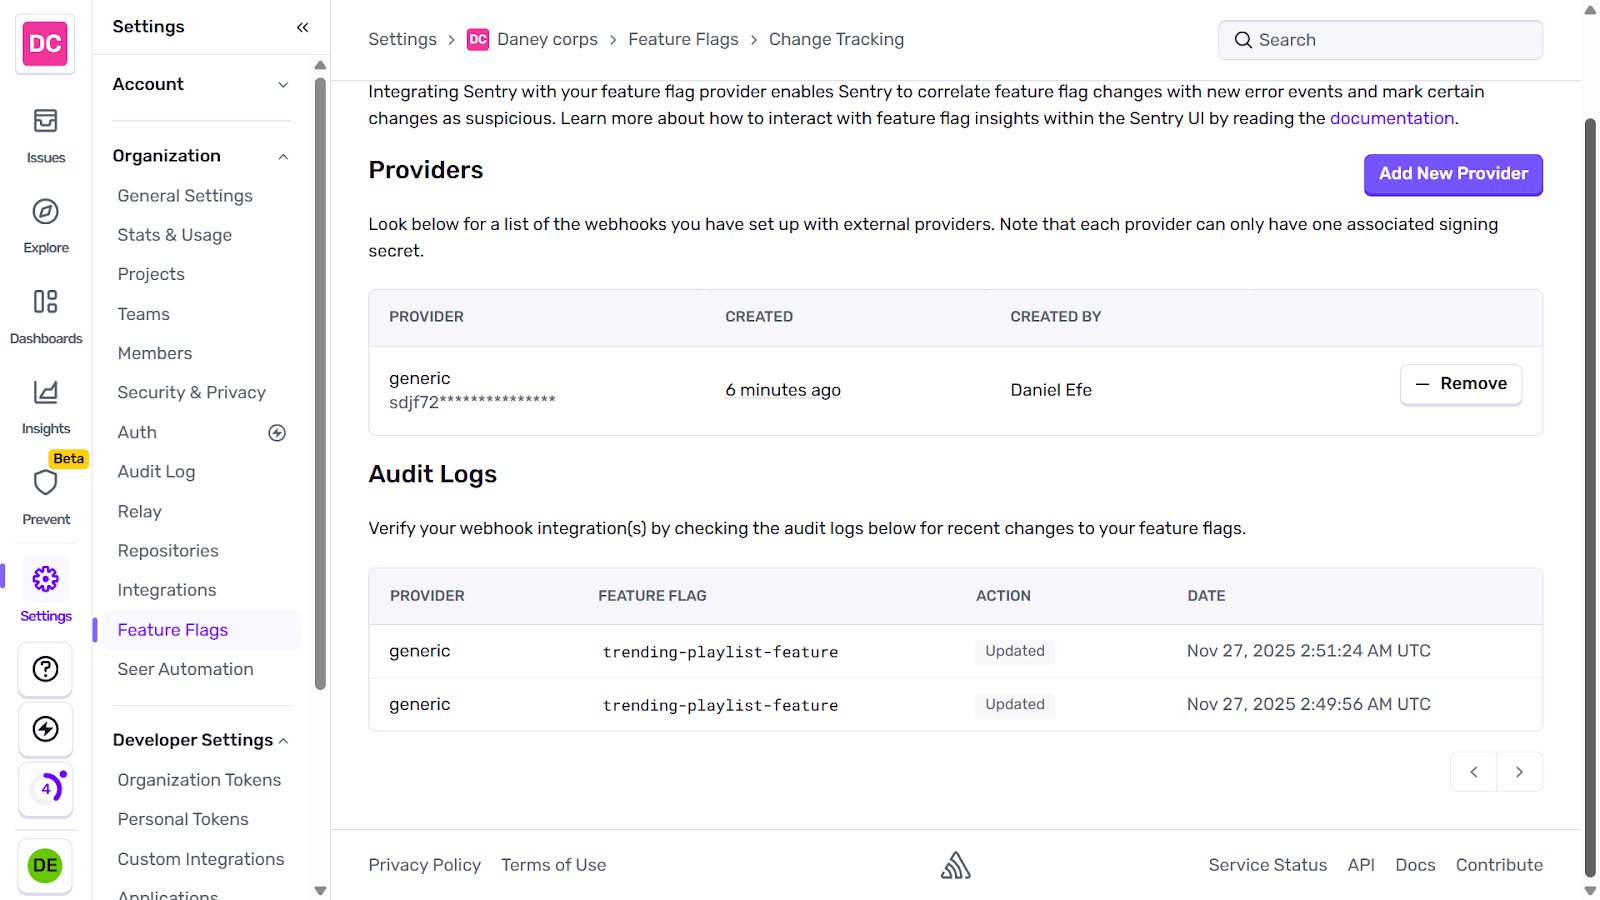
To confirm integration, navigate to your feature flag in Flagsmith and trigger a test event by toggling the flag on or off. This will send a Webhook payload from Flagsmith to Sentry, and you should find your changes recorded in Sentry’s Audit Logs section of the Change Tracking page.
Tracking feature flag evaluations
In addition to tracking flag changes, you can also use Sentry to track flag evaluations at runtime. This offers insights into specific feature flags that were active when an error or issue occurred for specific users, allowing teams to determine whether a flag state contributed to a bug.
Note: Flagsmith does not offer a built-in integration with Sentry to track flag evaluations. Rather, it uses the generic features flag integration to manually record flag evaluations.
To get started with integrating Sentry for feature flag evaluation, ensure Sentry is installed in your application.
Next, navigate to your instrumentation-client.js file and update its content as follows:
import * as Sentry from "@sentry/nextjs";
Sentry.init({
  dsn: "YOUR_SENTRY_DSN",
  sendDefaultPii: true,
  integrations: [
    Sentry.featureFlagsIntegration(), // Enables Sentry to record feature flag evaluations at runtime for errors or transactions
  ],
});
export const onRouterTransitionStart = Sentry.captureRouterTransitionStart;
Go to your src/app/page.js file and record your Flagsmith evaluation using the following code:
import * as Sentry from "@sentry/nextjs";
export default function Home() {
  const flagsmith = useFlagsmith();
  const discoverEnabled = flagsmith.hasFeature("trending-playlist-feature");


  // Attach feature flag value to Sentry
  const flagsIntegration = Sentry.getClient()?.getIntegrationByName("FeatureFlags");
  if (flagsIntegration) {
    flagsIntegration.addFeatureFlag("trending_playlist_feature", discoverEnabled);
  }
  return (
    <main>
    </main>
  );
}
In the code above:
- const flagsIntegration = Sentry.getClient()?.getIntegrationByName("FeatureFlags"); Retrieves the Sentry FeatureFlags integration instance.
- if (flagsIntegration) {flagsIntegration.addFeatureFlag(...); records the current state of your feature flag in Sentry, so it is attached when an error or transaction occurs.
Note: Flag evaluations are held in memory and only sent to Sentry when an error or transaction event occurs.
To confirm that Sentry is properly tracking your flag evaluation, navigate to your src/Components/Discover.jsx file and add a button tag that triggers an error any time it is clicked:
<div className="flex justify-center mt-12">
<button
  onClick={() => { throw new Error("Test error with flag evaluation"); }}
  className="bg-deeppurple text-white p-3 w-36 cursor-pointer"
>
  View playlist
</button>
</div>
To trigger an error event that will prompt Sentry to record the flag evaluation, click the ‘View Playlist’ button in your application.
This will cause Sentry to record the evaluation of your feature flag. To view the evaluated flag, navigate to your Sentry dashboard → Projects → your project (this tutorial uses javascript-nextjs).
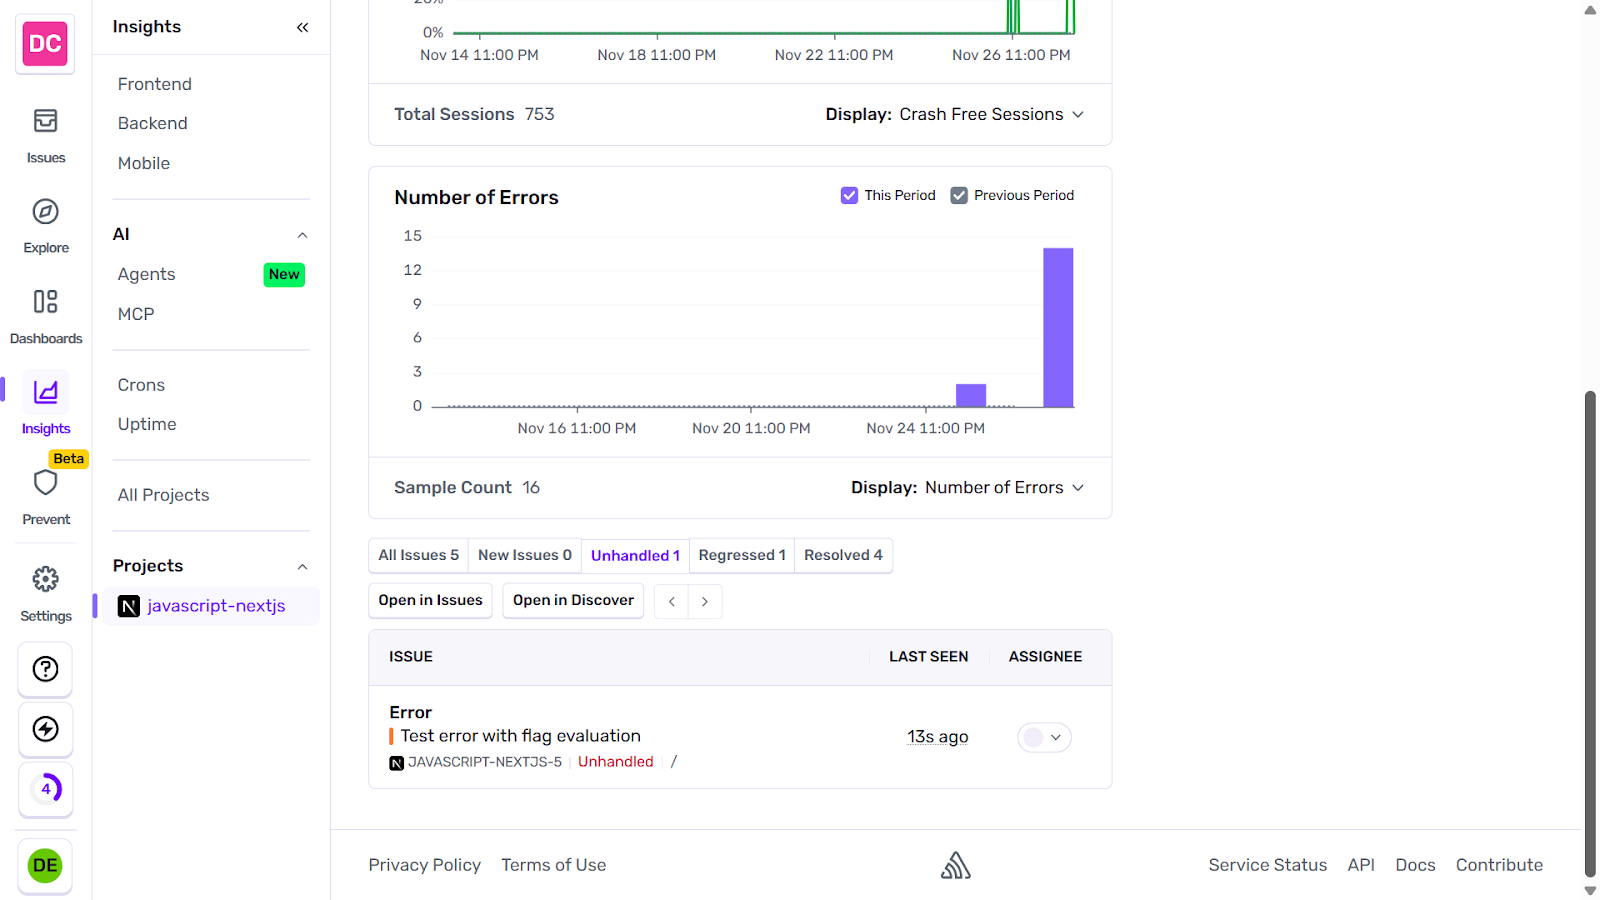
In the Issues section of your Sentry project, click on the relevant error to view the flag evaluation details.
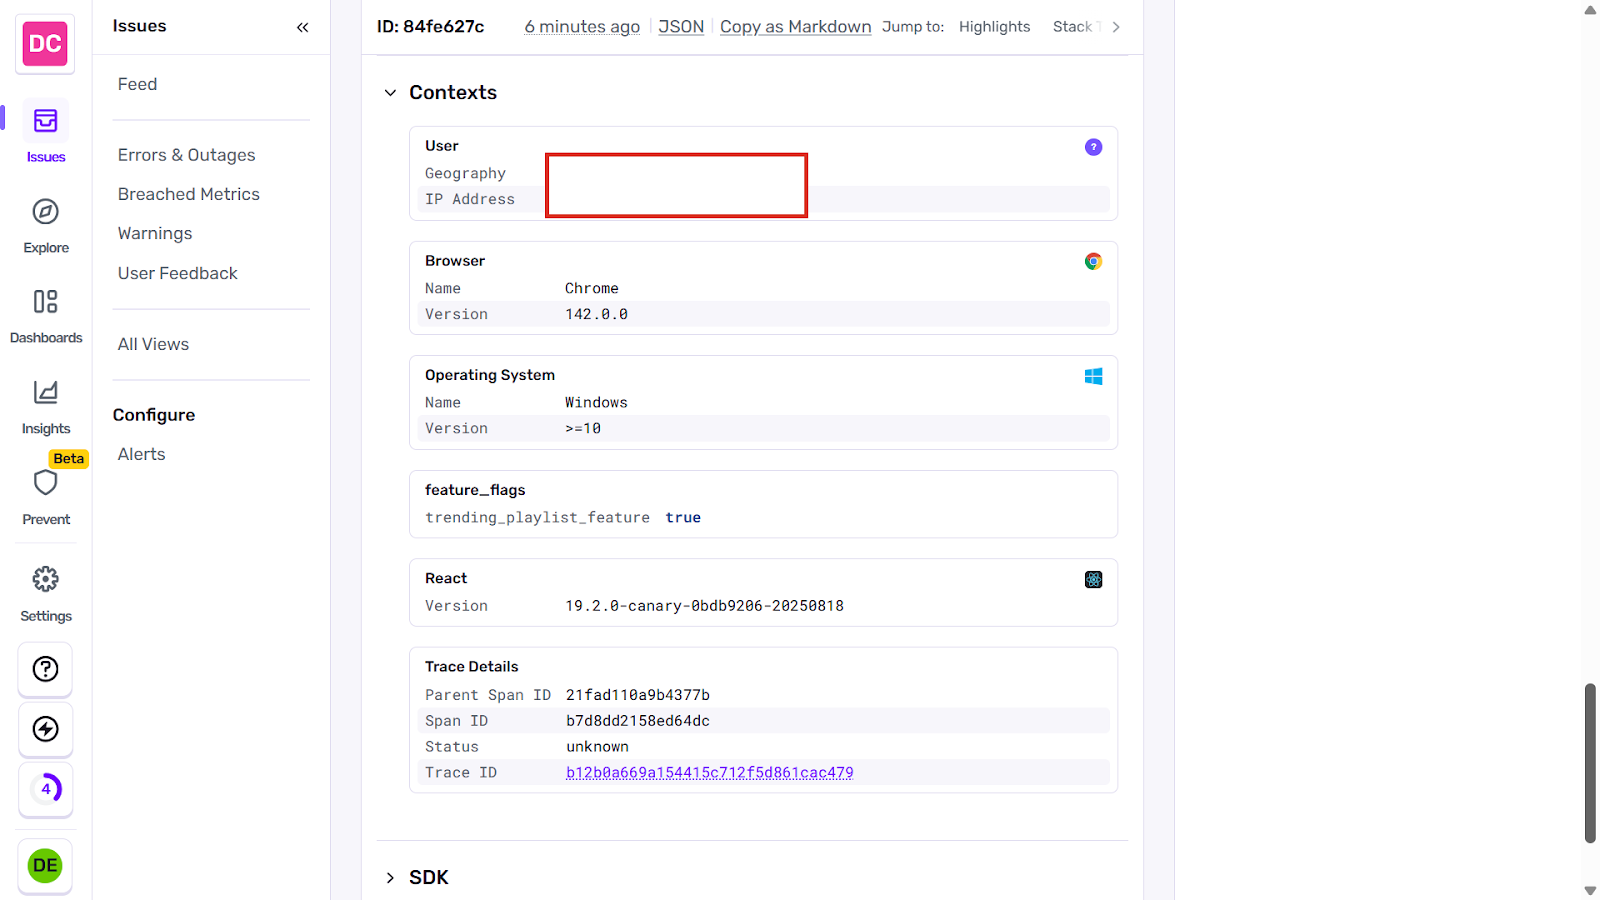
There you go! You can now see the flag that was active when the error occurred, along with details of the end user for whom the error was recorded.
Conclusion
In this tutorial, you integrated Flagsmith, a popular feature flagging tool, alongside Sentry, an error management system, on a demo project. This setup allows you to track flag changes and evaluations, offering you and your team insights into flag modifications as well as the active flags prior to an error occurring.
Moving forward, endeavor to incorporate all that you have learned into new and existing projects.
The source code for this tutorial is available on GitHub.


OpenTelemetry, without the vendor lock-in: Introducing full observability for Open Source and Self-Hosted Flagsmith customers


.png)
.png)

.png)

.png)


.png)


.webp)