
PHP Feature Flags: A Step-by-Step Guide in a Working Laravel Application


Feature flags help us switch a feature on or off by clicking a button as opposed to deploying new code. In this post, we will go through a step-by-step tutorial to add a PHP feature flag to an existing Laravel application that does CRUD for students. Let’s get started!
Prerequisites
Before proceeding to the code, below are some of the things that will be great to have:
- Prior working knowledge of PHP and Laravel will be required. We will use PHP 8 with Apache and Laravel 8 for this guide.
- Some experience with Composer will be necessary especially to install the Flagsmith PHP SDK.
- Any knowledge of Git and GitHub will be helpful.
- Prior experience with Docker and Docker-compose will be beneficial.
- A free Flagsmith account will be required to create the PHP/Laravel feature flag used in the tutorial. Register now – It’s free.
In the following section, we will look at the example application that can do CRUD for students. This app will be used as our base for adding a Laravel feature flag to show and hide the actions on the students listing page.
Example: Laravel Students CRUD application
>>Sign up for free and use feature flags!
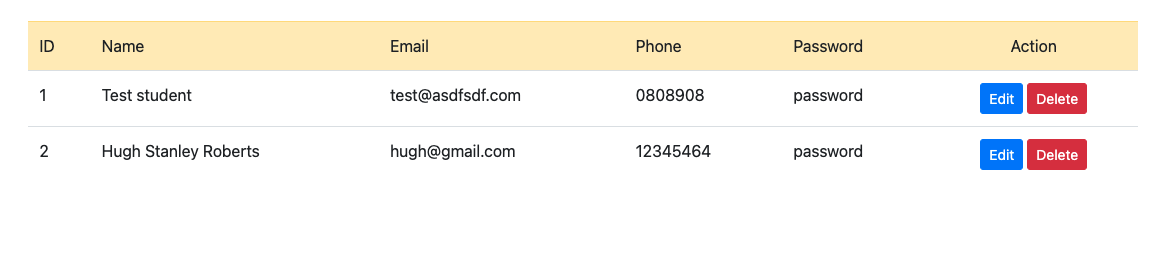
For this practical step-by-step guide, we will use a working Laravel application that can do CRUD for students. This is an open-source application that has been modified to support Docker and Docker-compose. The details on how the app is built are provided in this blog post. Thanks to Digambar for open sourcing this Laravel CRUD application for students. This is how the app looks:
It is a fully working application where we can view, add, update and delete basic students’ data. The listing page is accessible at URL/students as seen above. A new student can be created by going to URL/students/create.
The aim here is to show/hide the “Actions” which are Edit and Delete using a feature flag configured on Flagsmith. With this PHP feature flag implemented on our demo application, we can easily control showing or hiding the actions with the click of a button on the Flagsmith UI.
In the subsequent section, we will first set up the feature flag on Flagsmith. Then write the code needed to introduce this Laravel feature flag in our Students CRUD application.
Set up feature flags in Flagsmith
>>Sign up for free and use feature flags!
To create a feature flag for switching the visibility of the actions on the student listing page, we will first create a new project after logging into Flagsmith. After logging in, we can click the “Create Project” button found on the top right of the Projects page to create a new project as shown below:
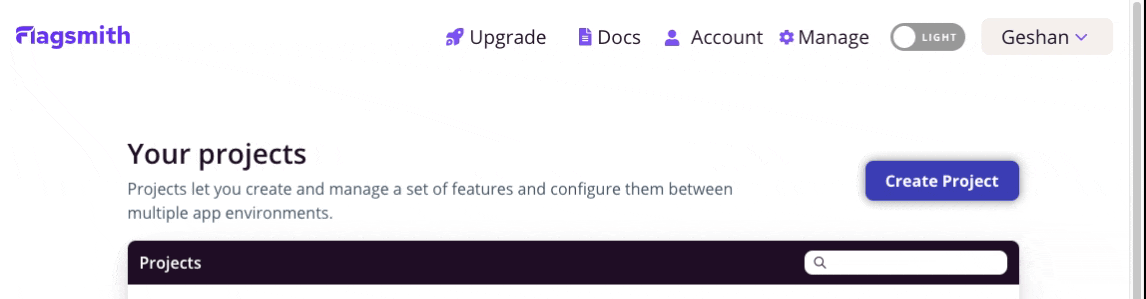
The project has been named `laravel-students-crud`, still, it is up to you to name it something better suited for your project. After the project is successfully created, the project page looks like the following:
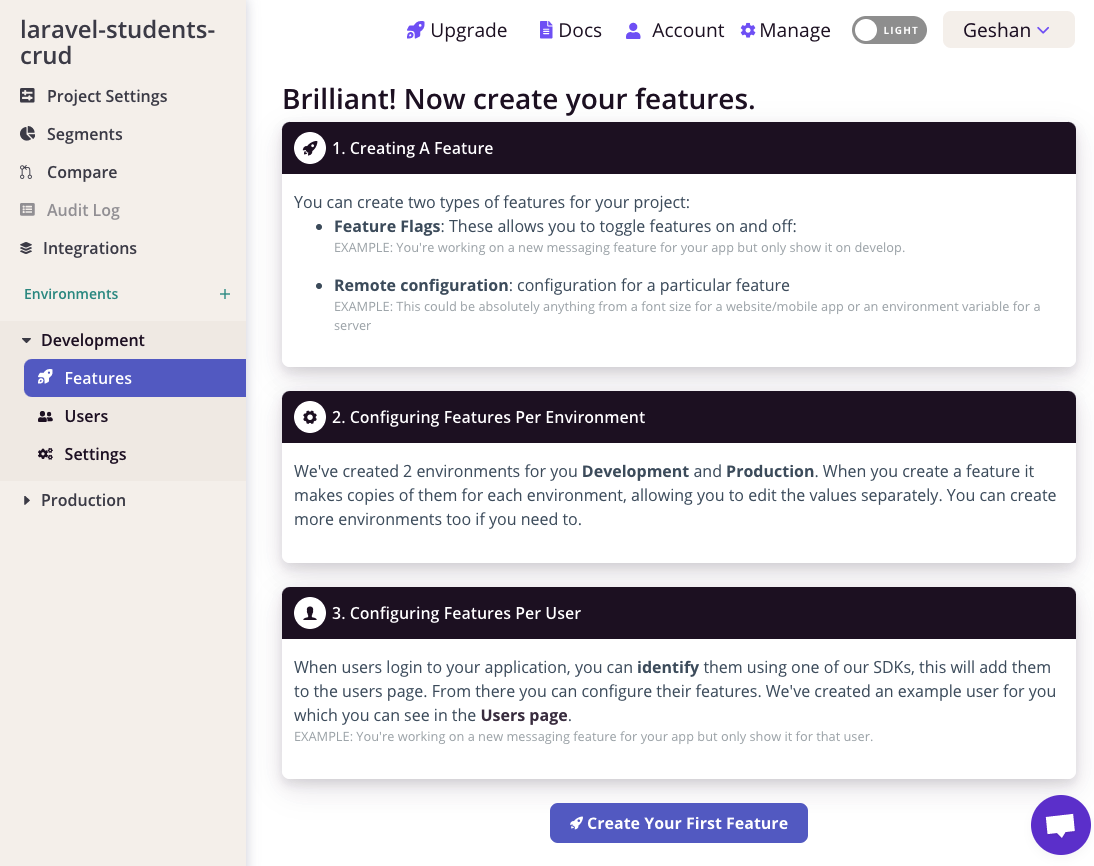
The next step for us is to create a new feature flag. We can do it by clicking the “Create Your First Feature” button found at the bottom of the page. It will give us a sliding form which can be filled in with details like below:
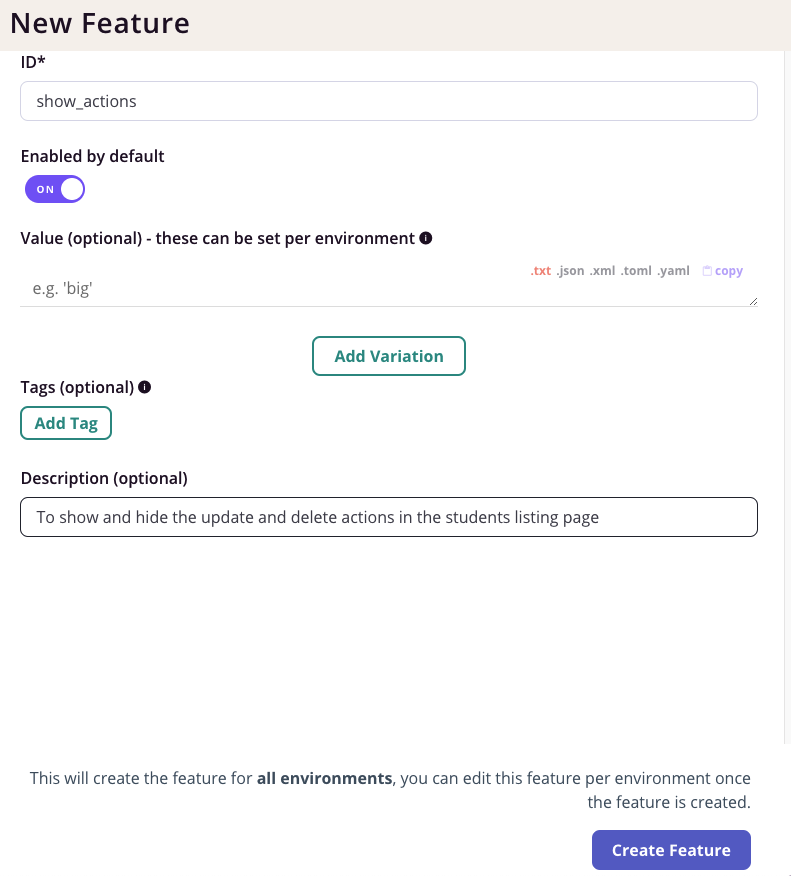
We will name our feature flag show_actions, it will be enabled by default. We will also add a description so that it is clear in the future what this feature flag is used for. After we hit the “Create Feature” button we will get to a screen like the following:
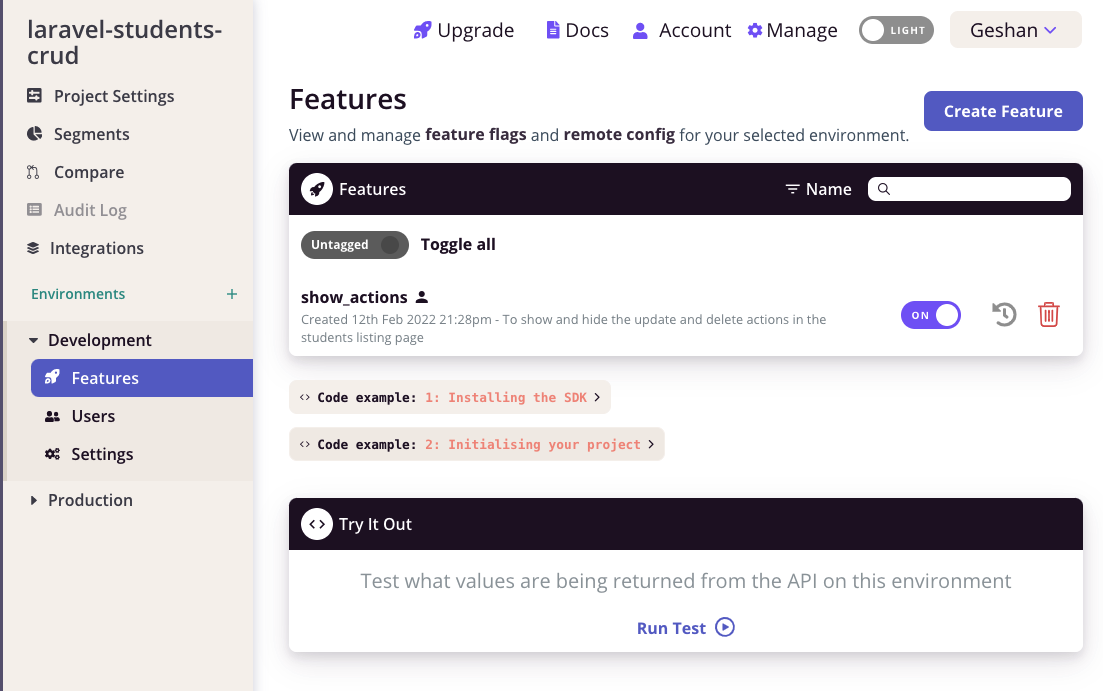
By default, Flagsmith will create 2 environments, one for “Development” and another one for “Production”. We will make use of these later in the code section. In the next section, we will clone the open-source Laravel Students application and add the Flagsmith PHP SDK to it. This SDK will be used to link up the feature flag we just created with the PHP Laravel CRUD application for students.
Install Flagsmith PHP client
>>Sign up for free and use feature flags!
From this point on, we will be writing some code and executing commands on the command line. To proceed further, we will clone the open-source repository which has the Laravel CRUD app. We can clone the repository by running:
After that, we will go into the directory, install the composer dependencies and test the app quickly by running it with Docker and Docker-compose. We will do this by executing:
cd laravel-crud-app
composer install
docker-compose up -d
It will start PHP with Apache and the app can be viewed at http://localhost:8081/students on your browser of choice, you will see something like below:
Consequently, we can stop the server with `docker-compose stop` and install the needed composer/packagist packages with:
This will install the Flagsmith PHP client and other needed packages like Symfony HTTP client, Symfony cache. Now that we have all the needed packages installed we can implement the code. To do the changes we will inject the Flagsmith PHP client using the App service provider and access it in the Student controller.
Even though the Flagsmith PHP client can be used with caching, to keep things simple we will not use any caching. Please read more about caching on the official Flagsmith PHP client docs to utilize the PSR based caching options.
We will add the following lines in the app/Providers/AppServiceProvider.php file as seen below to make the Flagsmith client easily injectable:
The main change here is, we have included the Flagsmith client file on line 6. Then we have bound the Flagsmith client with the proper API key pulled in from the environment variable. We can create a new service provider to inject this new dependency, I will leave that choice up to you.
The API key can be found in the feature flags page on Flagsmith under the Code Example: 2 section as shown below:
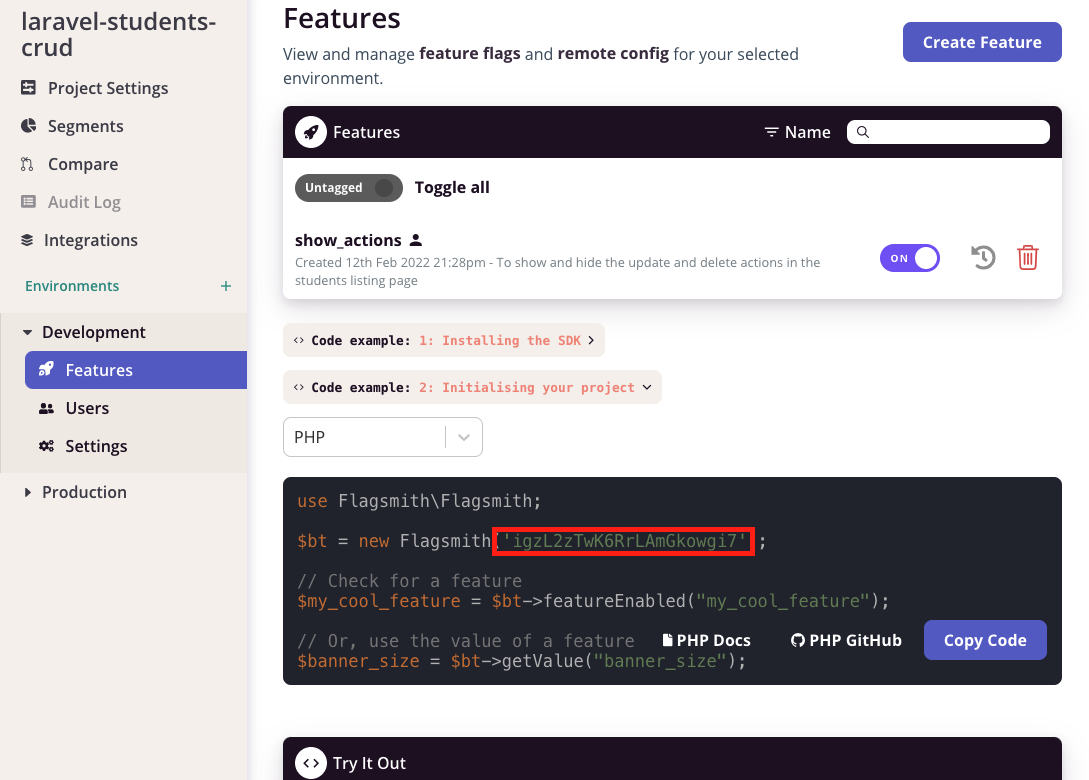
For testing and staging, we will use the Development environment. Given the key is provided with an environment variable it will be easy to change it on the live environment as it is a runtime variable.
Using the Flagsmith client in the controller
>>Sign up for free and use feature flags!
As the Flagsmith PHP client is injectable now, to use it for our PHP feature flag we can get it as a parameter in the Laravel App’s Student controller as follows:
The main change here is the inclusion of the Flagsmith PHP client on line 6. The Flagsmith client is also injected in the newly added constructor of the controller. Finally, the feature flags’ enabled status is pulled in on line 29 and the true/false value is passed to the view on line 30.
The final piece of the puzzle is to change the view to show/hide the actions column depending on the value of the feature flag. The code changes on the view part in the file resources/views/index.blade.php is as follows:
The main changes in this view file are on lines 25-27, there is a check to show the action column header depending on the showActions variable. Similarly, on lines 38-47 for each row the buttons “Edit” and “Delete” will only be visible if the “showActions” variable is set to true.
Testing the PHP feature flag in action
To test our PHP feature flag on a Laravel application doing CRUD for students, we will need to start the server if not started with:
Then we can point one of the browser’s tabs at http://localhost:8081/student and it will render something like:
Now we will go into Flagsmith’s UI and turn off the show actions feature flag as seen below:

After the flag is turned off, which involves confirming the changes, if we refresh our Laravel app’s student listing page we will see that the action column header and Edit and Delete buttons for each row have vanished as follows:
Hurray! Our simple PHP feature flag on a Laravel app is working as expected. Of course, it can be optimized with some PHP caching. As the app is dockerized if you want to deploy it you can try it out on Railway.app which has been discussed in the Node.js feature flags post. If you want you can also deploy Laravel on Google Cloud Run for a serverless container experience. The full set of changes is available as a pull request for your convenience.
Conclusion
In this tutorial, we looked at how to set up a simple example of a PHP feature flag on an existing Laravel application. We did not use any PHP caching but it can be utilized to make things faster and reduce the calls to the Flagsmith API.
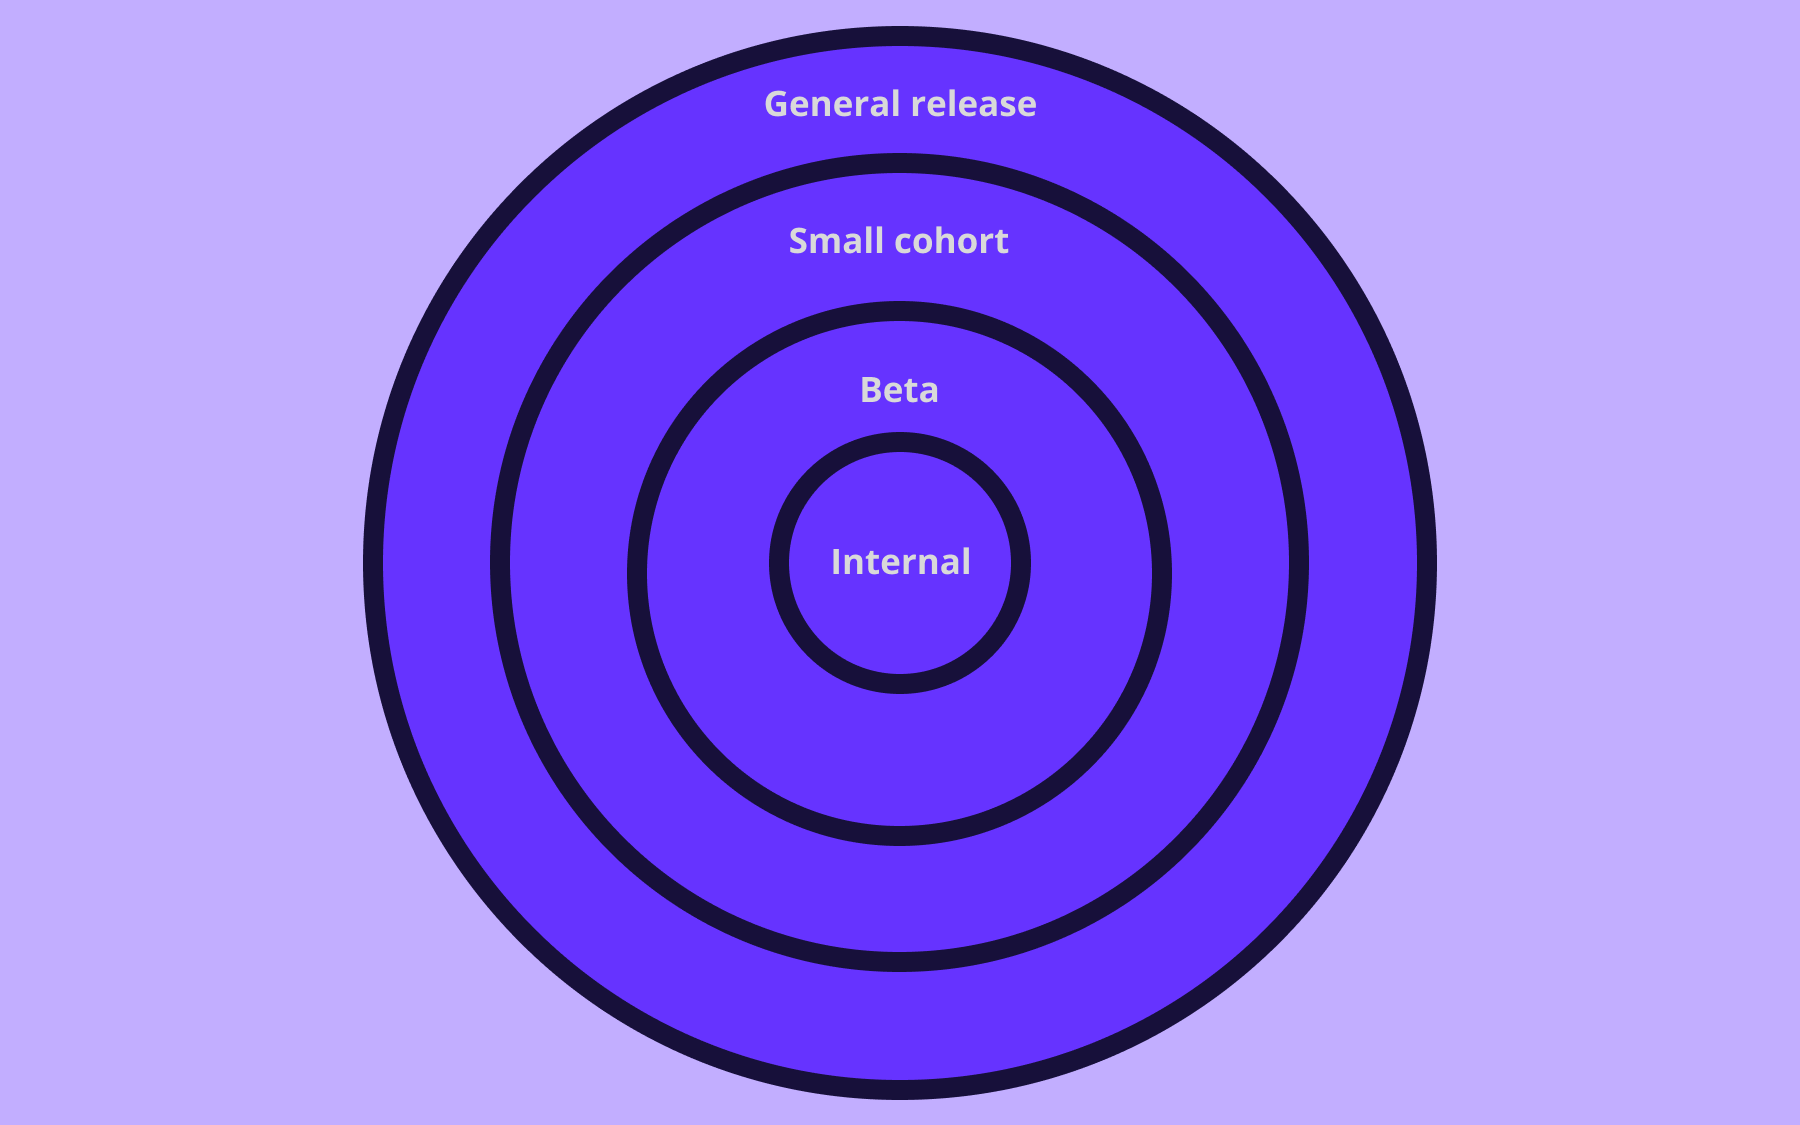
As usual, always try to reduce your blast radius while introducing any new feature with feature flags and canary deployments. When using feature flags don’t forget to apply feature flags best practices.
Flagsmith offers both hosted and on-premises solutions to make it easy for you to utilize feature flags and remote config with unbeatable pricing plans.
>>Sign up for free and use feature flags or check out our other tutorials below!
More reading


OpenTelemetry, without the vendor lock-in: Introducing full observability for Open Source and Self-Hosted Flagsmith customers


.png)
.png)

.png)

.png)


.png)


.webp)